Contents
A lot of users experience problems after they upgrade to Windows 10. Very ugly situation when your PC says “Update me! Update me to Windows 10” you agree and as a result you get unusable computer. Who needs a laptop with not working Wi-Fi? In this article we will explain what to do if Wi-Fi is not working on your laptop.
Before you start trying all the steps we advise you to:
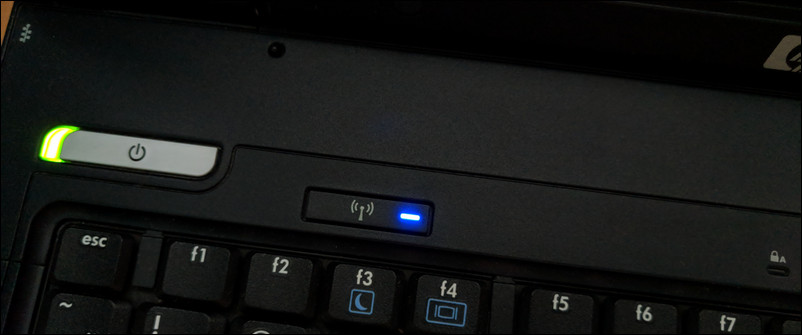
- make sure the Wi-Fi module is not disabled by a hardware button or toggle:
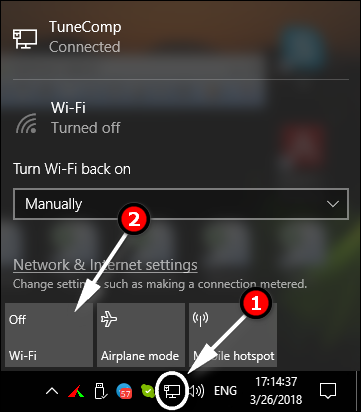
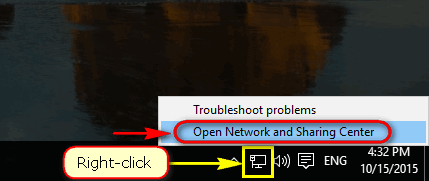
- toggle on Wi-Fi is disabled in network settings. You need to click the network icon in the Taskbar to check it out:
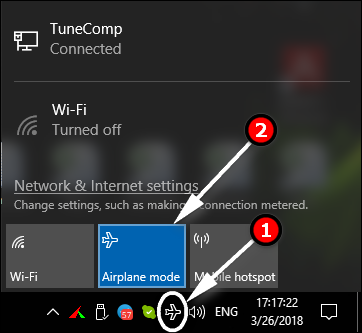
- deactivate the Airplane mode if it is activated on your laptop:
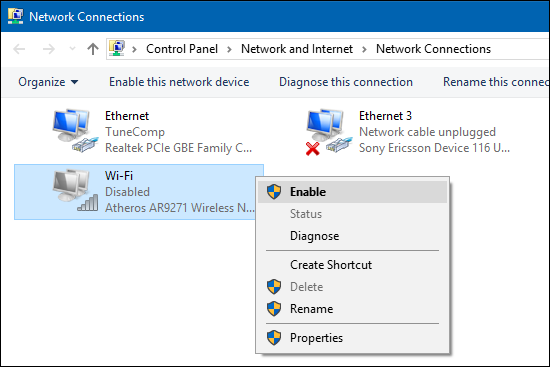
- enable Wi-Fi connection if it is disabled. Go to Network and sharing center → Change adapter settings:
- install all available updates for Windows 10 via Ethernet cable and reboot your laptop;
- if your laptop is acting up or slows down, scan your laptop with MalwareBytes and remove all found malware.
Step 1. Reboot Your Router
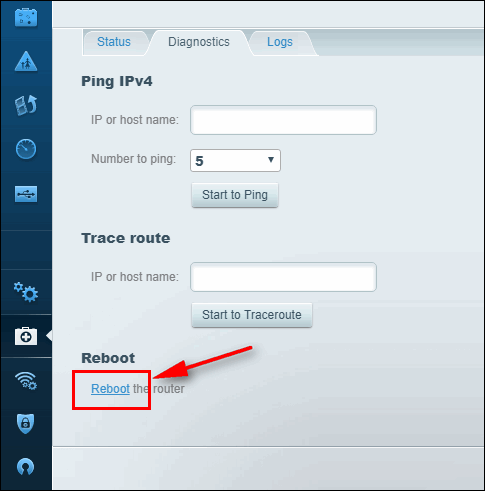
The easy way is to power cycle the router using a Power button or by disconnecting it from the power outlet. Another way is to log in to the web interface and select Reboot:
Step 2. Change Wireless Settings on Router
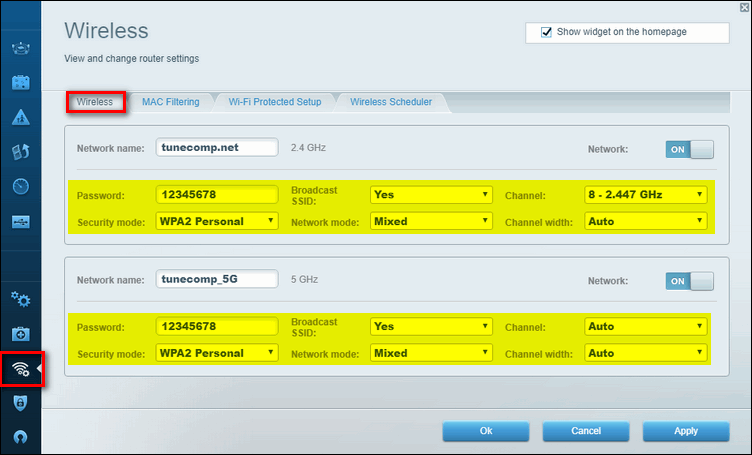
Log into your router settings. Head to Wireless Security settings and make sure you are using the following settings:
- Security Mode: WPA2-PSK.
It may also be named WPA Personal key. If WPA2-PSK is not available you may use WPA-PSK.
(Do not select Open or WEP options). - Encryption type: AES.
It can be named either AES, or AES-CCMP or CCMP.
(Do not use neither TKIP nor TKIP+AES options) - For Wi-Fi 2.4 GHz use mode 802.11 b/g/n mixed.
For Wi-Fi 5 GHz use mode 802.11 a/n/ac mixed. - Enable SSID broadcast. Otherwise you will have to manually type the SSID to connect to a hidden Wi-Fi network.
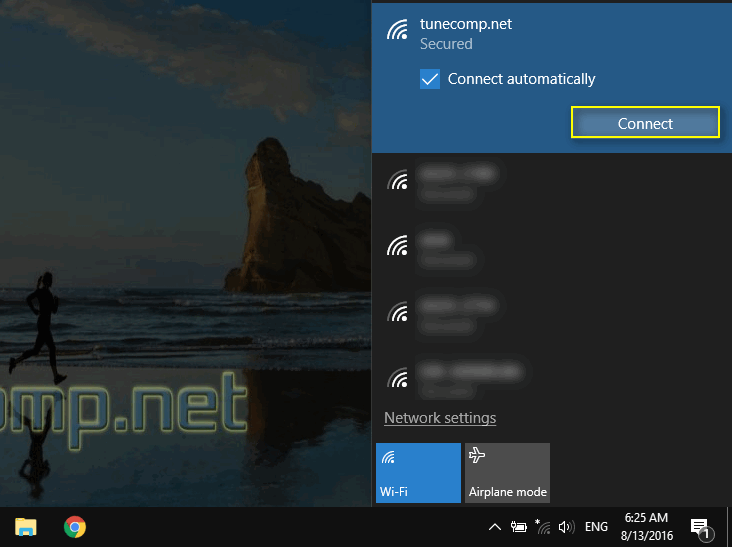
If you changed a wireless password, security mode or cipher type it is highly recommended that you forget the network on your laptop and reconnect to it from a scratch:
Step 3. Reset and Tune Your Network Connection
These commands can repair your Wi-Fi if it is not working properly. If you experience “404 not found” or “err_name_not_resolved” errors in the browser without any obvious reason, try this step.
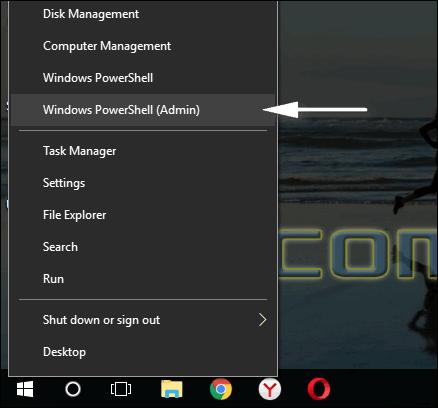
Launch command prompt or PowerShell as administrator:
Run these commands:
netsh int ip reset
netsh int tcp set heuristics disabled
netsh int tcp set global autotuninglevel=disabled
netsh int tcp set global rss=enabled
netsh winsock reset
Reboot your PC.
Step 4. Ensure you are not using FIPS
Federal Information Processing Standards is an option in the network settings that is disabled by default. But we met cases in our practice when this checkbox set by someone was causing problems with Wi-Fi in Windows. With this feature activated your laptop Wi-Fi may not be working normally, keep disconnecting and losing frames.
Do the following:
Go to Network and Sharing Center.
- Click on your current Wi-Fi connection:
- Click Wireless Properties.
- Go to the Security tab
- Press the Advanced settings button:
- Unset the checkbox Disable FIPS by unsetting the correspondent checkbox and press OK:
Step 5. Turn off the Power Saving on Windows PC or Laptop
Power saving feature is yet another reason why wireless adapter may not work in Windows 10 because of faulty drivers. SO you should check this step even if this sounds weird to you.
5.1. Disable Power Saving in Device Manager
- Launch the Device Manager (Win+R, devmgmt.msc, Enter):
- Expand the Network Adapters and open your wi-fi card’s properties (802.11 Network Adapter):
- Unset the checkbox Allow the computer to turn off this device to save power and press OK:
5.2. Improve Wireless Performance in Power Options.
This is a rather rare issue caused by particular drivers bad development. It was met on Fujitsu Lifebook AH531 series under Windows 7 and 10. So we recommend that you switch to High Performance plan. It can solve the problem of packet loss over Wi-Fi.
Step 6. Update Wireless Network Drivers to Solve Problems with Wi-Fi
Go to the official website and search for network drivers for Windows 10. Install the latest version of your driver. Be sure to correctly select the exact model of your PC. Otherwise you can download non-compatible driver which will work unstable or won’t work at all.
If the driver update doesn’t fix the problem try to uninstall the network driver and reboot your system. Windows 10 will automatically download a different driver from Windows Update Center. In many cases this method fixes the issue.
If wireless components by Ralink are used…
A great variety of laptops by HP, Asus and other respectable vendors use Wi-Fi network cards and Bluetooth modules produced by Ralink. If you have Ralink wireless equipment hardware you must have faced some issues with performance or stability after upgrading to Windows 10. The worst thing is that official websites do not solve the problem. In most cases if you visit the official website of your laptop (or desktop) you will see that there are no Ralink drivers for Windows 10.
Hopefully you will make your Wi-Fi work after you try our tips. Please, add your own solution in the comments if you’ve found a working one. Maybe it will help others solve the problem with not working Wi-Fi in Windows 10.

