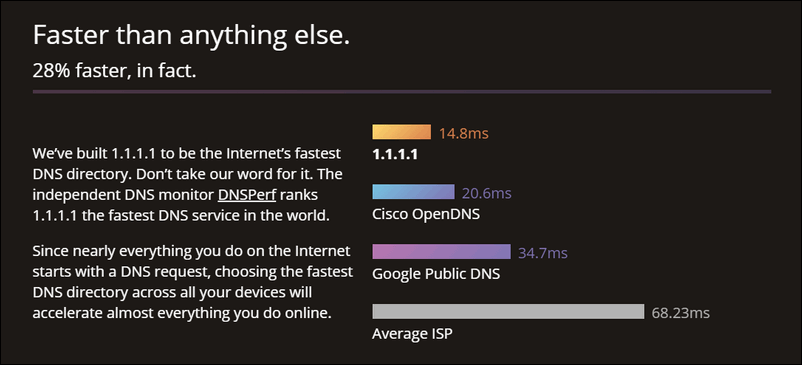
Cloudflare DNS is a DNS resolver that anyone can use for free. The company claims it to be the world’s fastest and the most private service while your ISP’s DNS servers are usually much more slow and insecure.
Cloudflare provides DNS over HTTPS (DoH) encryption for your ISP to be unable to sell you DNS data. 1.1.1.1 – is the primary IP address of Cloudflare private and fast DNS. 1.0.0.1 is the IP of their secondary resolving server. If you use IPv6 you should type 2606:4700:4700::1111 and 2606:4700:4700::1001 respectively.
We recommend that you switch to Cloudflare DNS on your router and mobile data to speed up your Internet connection and make it more secure.
In this article we will explain how to assign 1.1.1.1 and 1.0.0.1 DNS servers on a router, computer with Windows 10, phone and tablet under Android 9 or iPhone/iPad running iOS 11 and 12.
You can also visit the official website – https://1.1.1.1 to read additional information about the service.
[Quick Navigation]:
- How to use Cloudflare DNS servers on your Wireless Router
- Configure DNS on a computer with Windows 10
- Set 1.1.1.1 as a DNS server on Android device for Wi-Fi connection
- Set 1.1.1.1 as a DNS server on iPhone & iPad for Wi-Fi connection
- How to use 1.1.1.1 DNS server on cellular connection (mobile data) on iPhone and Android
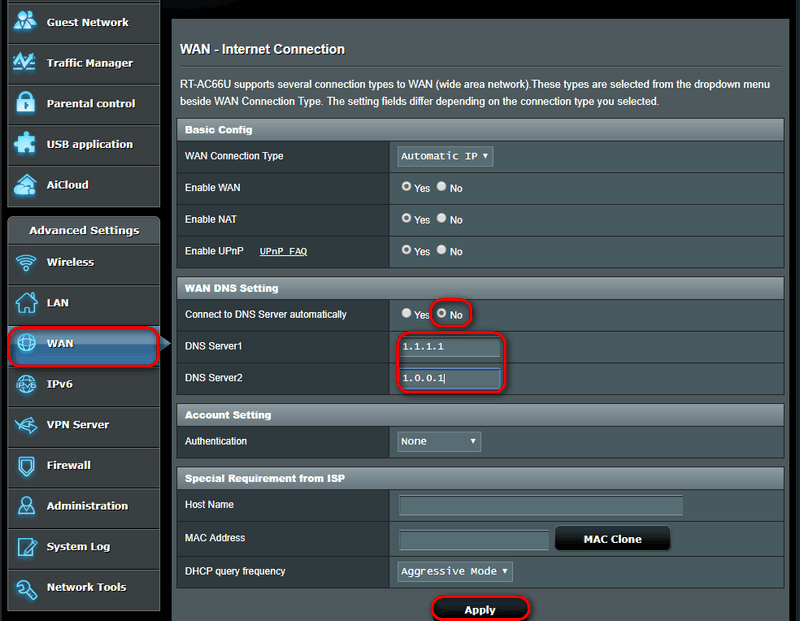
How to Switch your Router to Cloudflare DNS
- Log into your router settings by typing the username and the password.
- Head to the WAN or Internet settings page.
- Switch to manual DNS settings.
- Specify 1.1.1.1 as your primary DNS server and 1.0.0.1 as your secondary one:

- Click Apply or Save Settings.
- Reboot your router to be 100% sure that it started using new DNS servers.
Now all the devices connected to this router via Wi-Fi and Ethernet will use Cloudflare DNS.
Assign 1.1.1.1 and 1.0.0.1 as DNS Servers on a PC Running Windows 10
If your PC is connected to your ISP directly or you don’t have access to the router you can specify Cloudflare DNS manually in the network settings of your Windows computer.
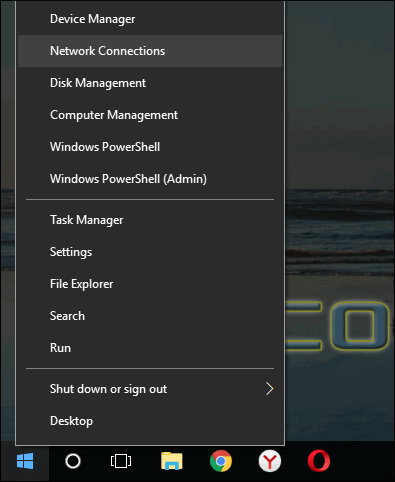
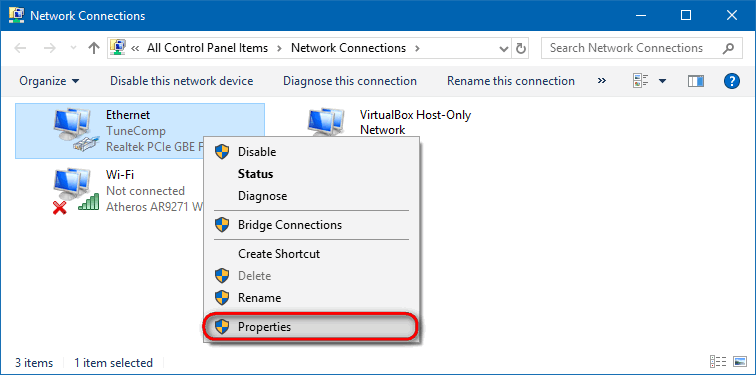
- Right-click the Start button and select Network connections:

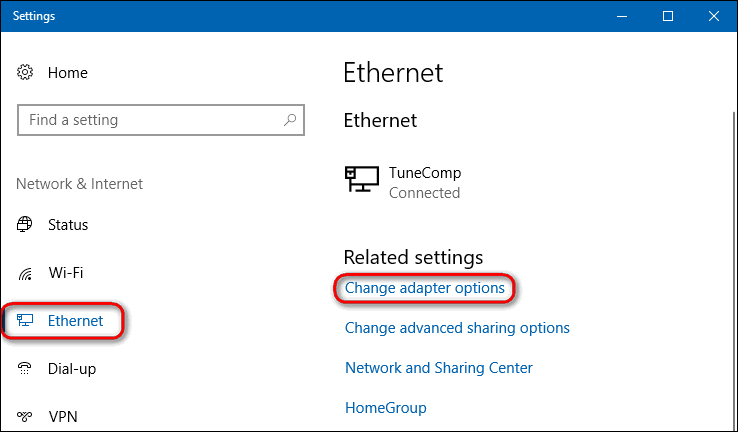
- Now select Ethernet or Wi-Fi – it doesn’t matter which one you click in this step.
- Click on Change adapter settings:

- Right-click on Wi-Fi or Ethernet connection depending on what type you are currently using and select Properties:

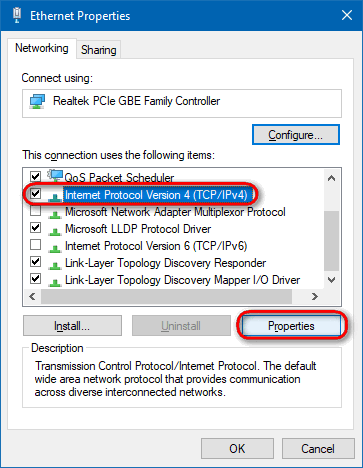
- Now select IPv4 or IPv6. Cloudflare DNS works with both protocols.
- Click the Properties button:

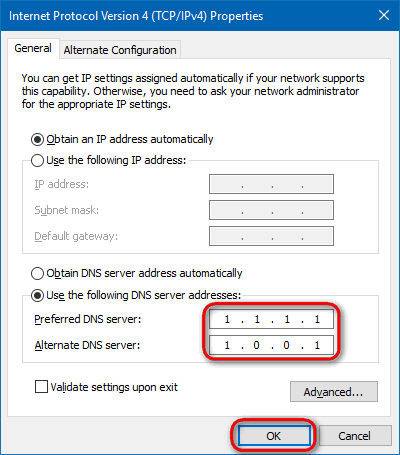
- Select Use the following DNS server addresses.
- Type 1.1.1.1 and 1.0.0.1 addresses into Preferred and Alternate fields if you use IPv4:
 If you use IPv6 copy and paste these server addresses:
2606:4700:4700::1111
2606:4700:4700::1001
- Don’t forget to click OK to save settings. After that click Close in the other windows.
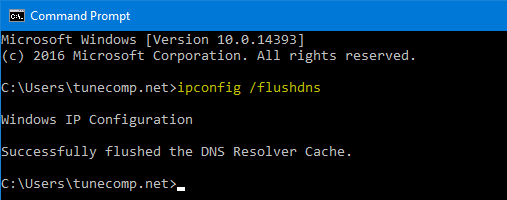
- Now it is highly recommended to flush your DNS and clear your browser’s cache.
To flush DNS cache open command prompt, type ipconfig /flushdns and hit Enter: Now open your web browser, press Ctrl+Shift+Del, in the Time range select All time, check Cached images and files and click CLEAR DATA:
 If you use IPv6 copy and paste these server addresses:
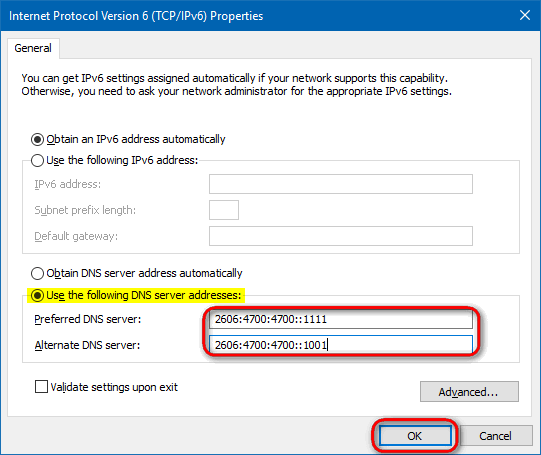
 Now open your web browser, press Ctrl+Shift+Del, in the Time range select All time, check Cached images and files and click CLEAR DATA:
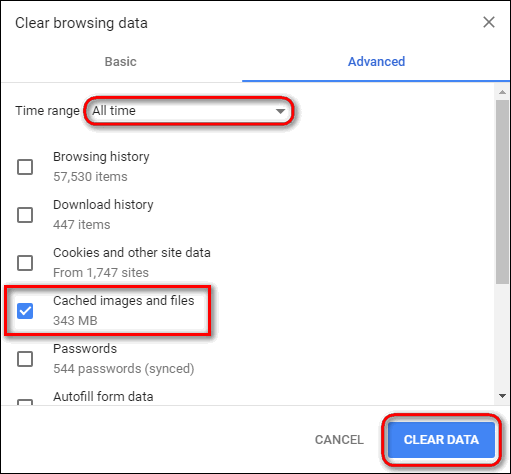
Using Cloudflare DNS on Android
Some time ago we explained how to manually assign DNS servers on old Android versions. In this paragraph I will show how to set up 1.1.1.1 as a primary server on Android 9.
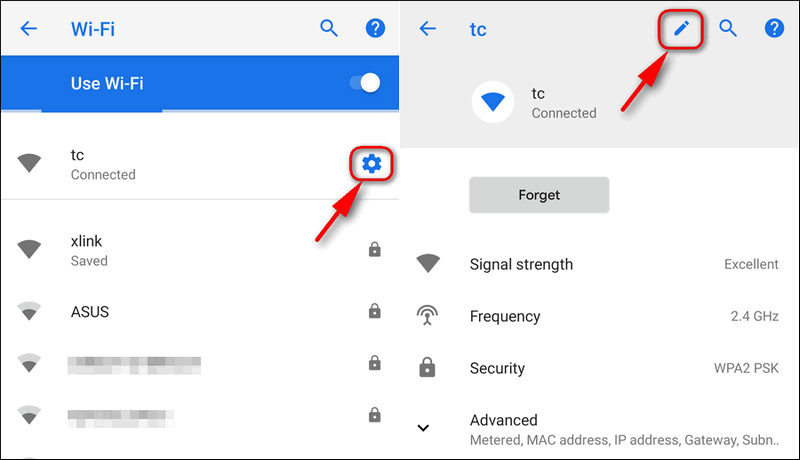
- Go to Settings → Network & Internet → Wi-Fi
- Tap the gear icon near your active Wi-Fi connection and then tap on the pencil icon to modify its settings:
 or
or
long tap on the saved wireless network and select Modify network:
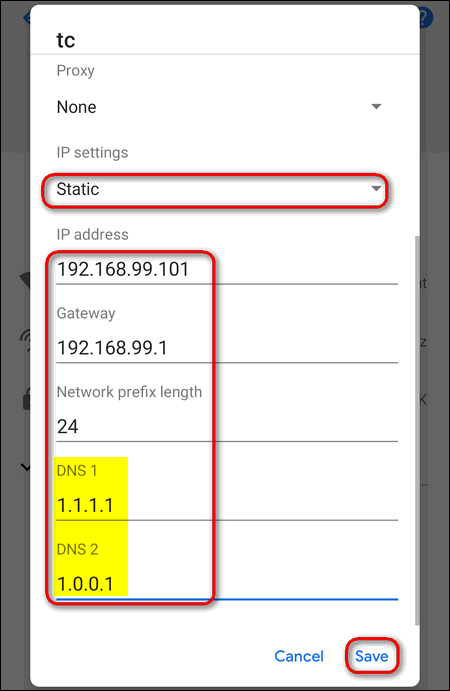
- Now tap Advanced, in the IP menu select Static and fill in your IP address, network prefix (in most cases 24 if you use home Wi-Fi router) and finally type 1.1.1.1 and 1.0.0.1 in the DNS 1 and DNS 2 accordingly:

 or
or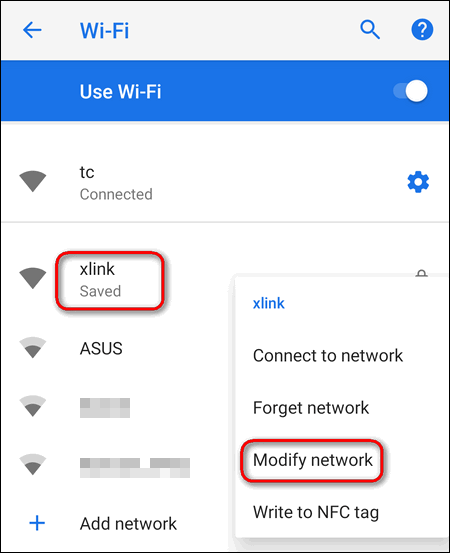
Setting Up 1.1.1.1 on iPhone or iPad
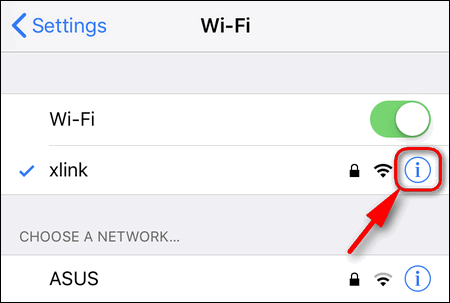
- Go to Settings → Wi-Fi.
- Tap the ‘i” icon near the network you need:

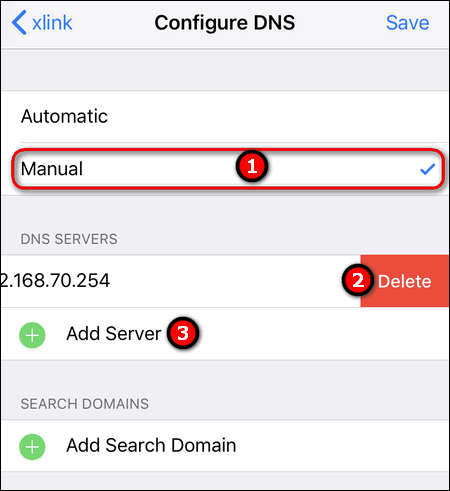
- In the DNS config select Manual.
- Remove the current server by swiping left and tapping Delete.
- Then tap Add server:

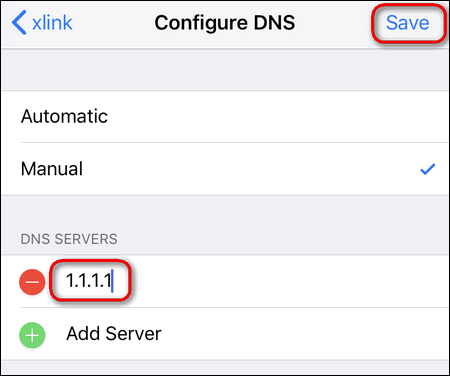
- Type 1.1.1.1 and 1.0.0.1.
- Tap Save:

How to use Cloudflare’s 1.1.1.1 DNS server on cellular connection (mobile data) on iPhone and Android
Many of you want to use the faster and more secure DNS on your mobile data. But, as you might know, you cannot manually assign a DNS server for your cellular connection. Long story short, you need to install the official app for this purpose.
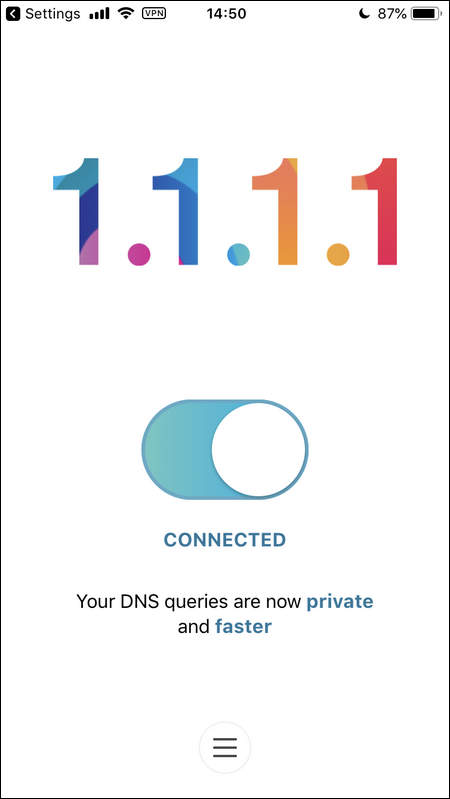
Go to Google Play Store or Apple Store and install the 1.1.1.1: Faster Internet app on your iPhone or Faster & Safer Internet on your Android device device.
Then simply launch it and follow the instructions to activate it. Now you may enable and disable it at any time:
Enjoy Cloudflare’s fast and secure DNS on your devices!
thanks for providing article that are very useful for me