Contents
The ultimate step-by-step guide on how to connect to a hidden Wi-Fi network (hotspot that is not broadcasting its SSID) on Windows 10 desktop or laptop, phone or tablet with Android 8, 9, 10, iPhone or iPad (iOS 11, 12, 13)
As you probably know, you can hide your Wi-Fi network name in the settings of your wireless router (or access point) to improve security of your hotspot. After you hide SSID, everyone will first need to enter the correct SSID and only then – a valid security key to connect to your wireless network. And here is how to connect to a hidden Wi-Fi network that doesn’t broadcast its name.

Connect To A Hidden Wi-Fi Network From Windows 10 PC
Screenshots taken from a laptop running Windows 10 Pro Creators Update
- Click the Wi-Fi icon in the system tray of the taskbar. You will observe “Hidden Network (Secured)” in the list if there is any available nearby.
- Click on Hidden Network:

- Click Connect:

Connect to a Hidden Wi-Fi hotspot (Secured) - Enter the name for the hotspot (a.k.a. SSID) and click Next:

First, you must enter the correct SSID to connect to a hidden Wi-Fi - Enter the password (a.k.a. security key) and click Next:

- Decide whether you would like your PC to be discoverable on the network or not:

- Now your computer is connected to a hidden Wi-Fi:


Quite simple.
Connect To A Hidden Wireless Network From Android
Screenshots taken from Google Pixel running Android 8.0.0 Oreo
- Tap and hold the Wi-Fi toggle in Quick Settings of your Android device:

- Tap “Add network”:

- On the following screen specify network name, security mode, password and tap Save:

- Your Android is now connected to the hidden Wi-Fi:

Connected


Connect To Wi-Fi With Hidden SSID From iPhone / iPad
Screenshots from iOS 11
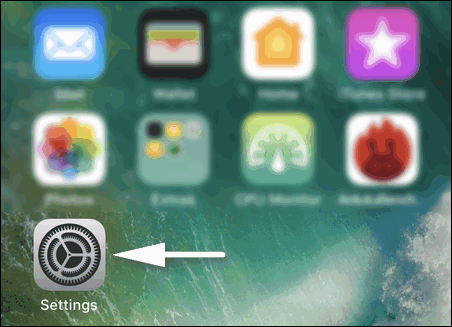
- Go to “Settings”:

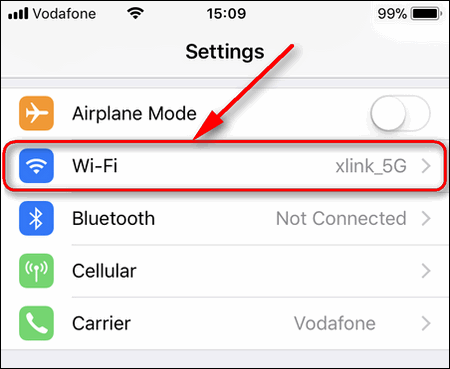
- Select “Wi-Fi”:

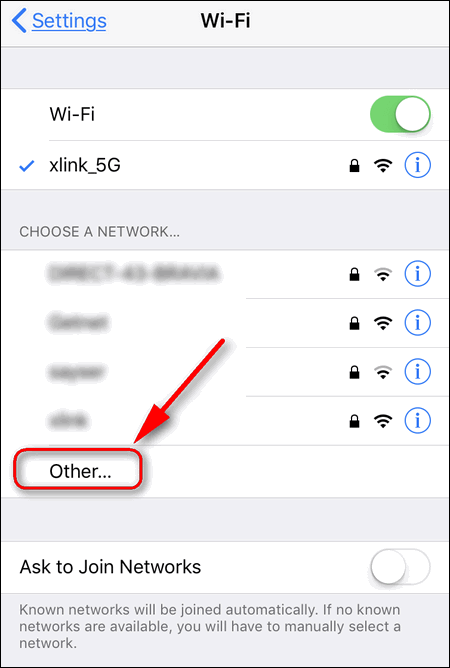
- Ensure Wi-Fi is ON.
- Tap “Other”:

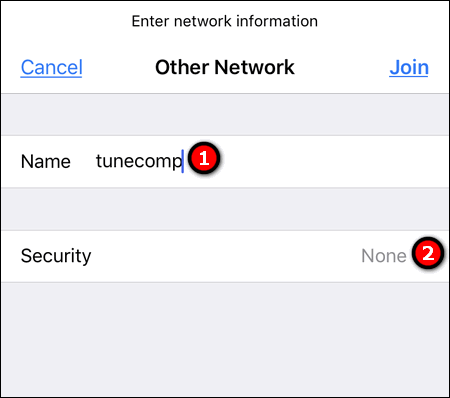
- Enter the name of the hidden Wi-Fi hotspot in the “Name” field.
- Tap “Security”:

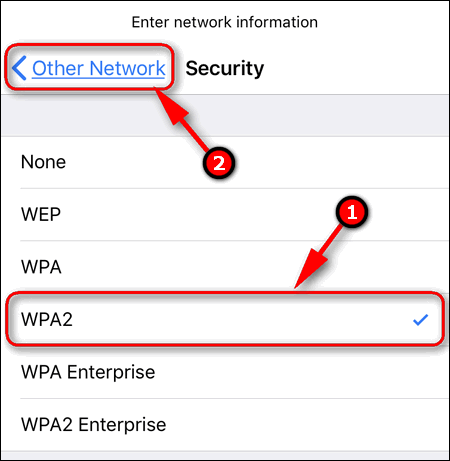
- Choose the security mode. In most cases it is WPA2.
- Tap “Other network”:

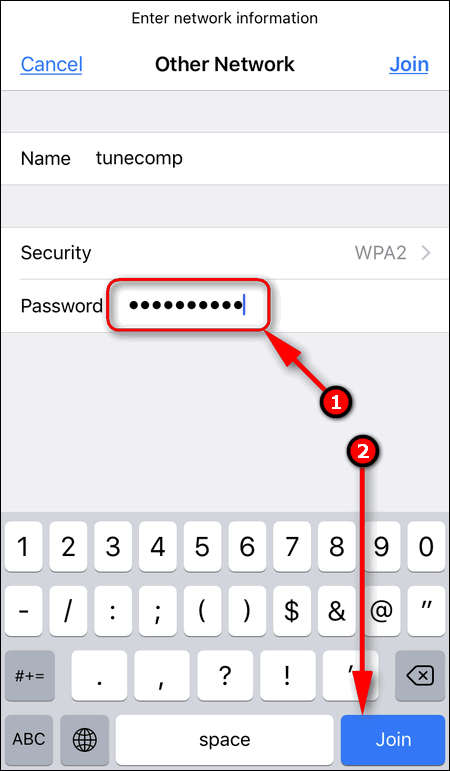
- Now specify the security key in the “Password” field.
- And finally tap “Join”:

That’s it!
Good