Contents
When You Need to Reset TCP/IP Stack
The procedure of resetting the TCP/IP stack often helps to fix problems with network that occurred due to:
- a malware activity;
- an incorrect operation of legal software;
- the installation of non-native network drivers;
- the installation of Windows updates;
- system failures of the operating system.
It is recommended to reset the TCP/IP and Winsock directory if you face the following problems on your Windows PC:
- Wi-Fi connected but no Internet access;
- Wi-Fi keeps disconnecting;
- there is no access to LAN;
- LAN, Internet or network software works slowly or unstable.
How to Reset TCP/IP Stack and Winsock
Launch the command prompt or PowerShell as administrator:

Press Yes in the UAC warning window:

Type command to reset the TCP/IP stack:
netsh int ip reset
Hit Enter on your keyboard:
Now type command to reset the Winsock directory:
netsh winsock reset
Hit Enter:

After that, we recommend to release and renew your IP address.
For this, first, type:
ipconfig /release
and then, type:
ipconfig /renew
In the end flush your DNS cache using the command:
ipconfig /flushdns
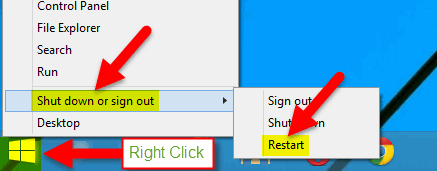
Restart your computer!
When your PC boots up, check if the network-related issues are solved.