Contents
If you encounter problems while using DHCP (auto IP obtaining) on Android you might need to manually set a static IP-address.
You may also decide to assign a static address to your Android phone if you want to use a specific IP on a Wi-Fi network but don’t want to set up the IP reservation on your access point or if you simply don’t have access to the router settings.
You can easily revert the network setting to its default state at any time and continue using DHCP.
Here is how to set a static IP-address on a phone or tablet running Android 10 and older versions.
We illustrated the article using screenshots from Samsung Galaxy One UI 2.0 (Galaxy S20, S10), One UI 1.1 (S9), Samsung Experience (S7), old Touchwiz (Ace 3) and stock Android 8 to 10 version (Google Pixel).
Set a Static IP-Address on Stock Android
Android 8
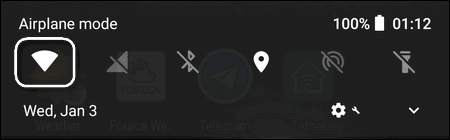
- Pull down the shade.
- Touch and hold on the Wi-Fi toggle to open its settings:

- Connect to the wireless network you want to set a static IP-address for.
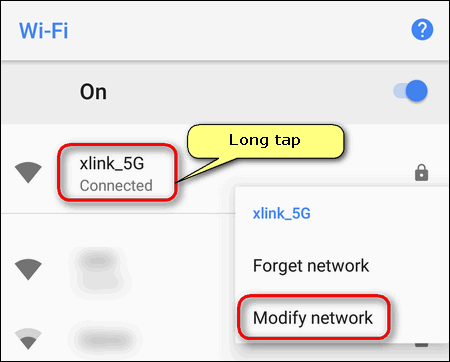
- Long tap on your Wi-Fi network name.
- Select Modify network:

- Tap the arrow to show the Advanced options.
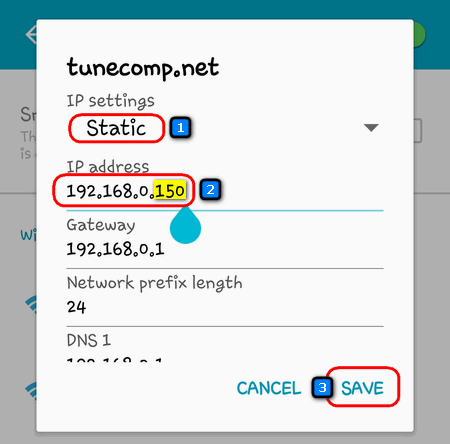
- In IP settings select Static.
- Specify IP-address for this Android device. You should use a free IP from the range. For example, 192.168.0.150.
- Type the gateway address.
- Specify the primary DNS (for example, Google DNS)
- Click Save:
Android 9 and 10
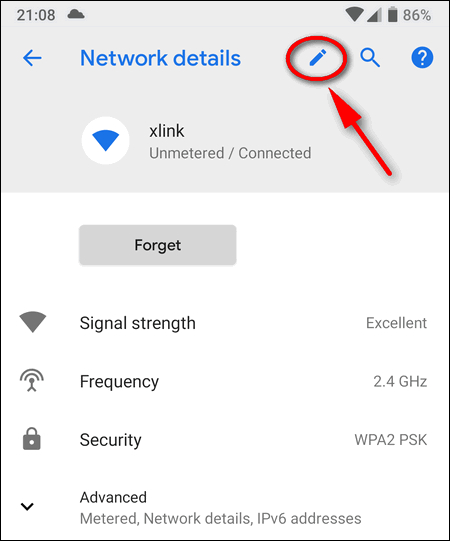
In Android 9 Pie you should tap the network name in the list (no long tap available), then select the pencil icon to modify its profile:
The remaining steps are equal to the steps from Android 8 section.
Manually Configure a Static IP on Samsung Galaxy
Static IP on Samsung Galaxy S20 with One UI 2.0
- Pull down the notification shade.
- Hold down the Wi-Fi toggle to open Wi-Fi settings.
- Make sure to connect to the right hotspot, where you are going to use a manually configured IP address.
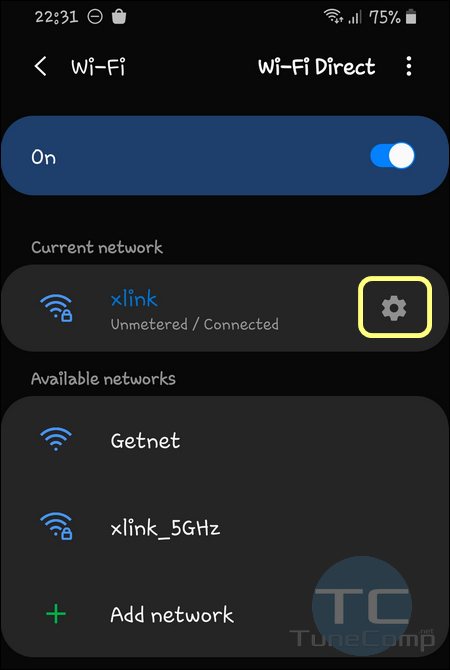
- Tap the gear icon to modify settings of your current network:

- Tap on Advanced at the very bottom:

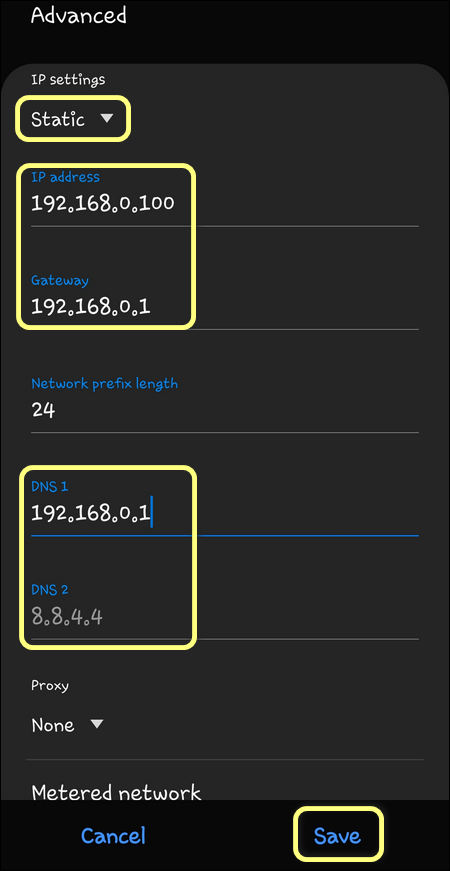
- Switch from DHCP to Static.
- Specify the IP address you want to use on your Galaxy phone.
- Type the Gateway IP and DNS.
- Finally tap Save for changes to take effect:


Samsung Experience (Galaxy S7)
- Hold down the Wi-Fi toggle to dive into network settings.
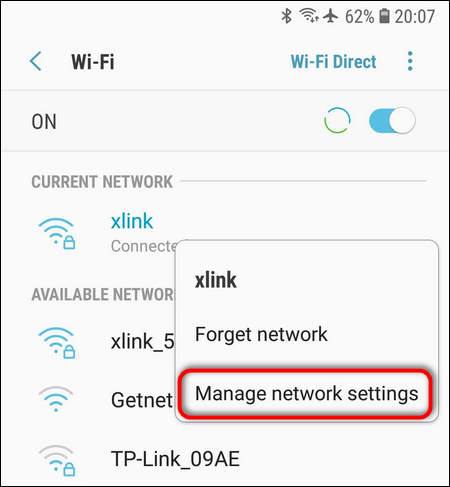
- Long tap on your current wireless network.
- Select Manage Network Settings:

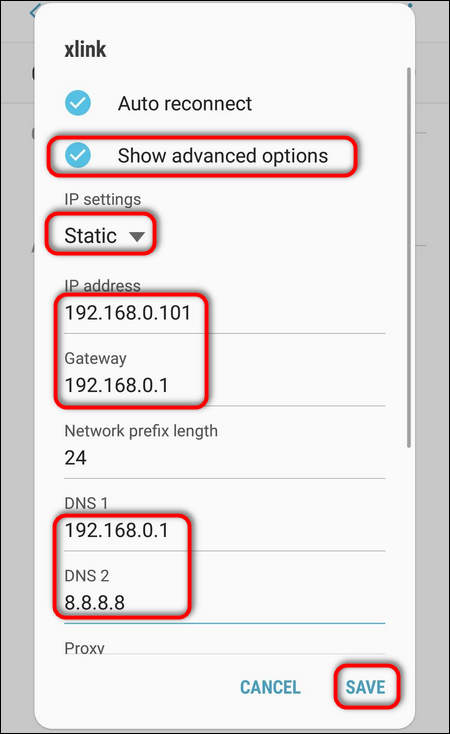
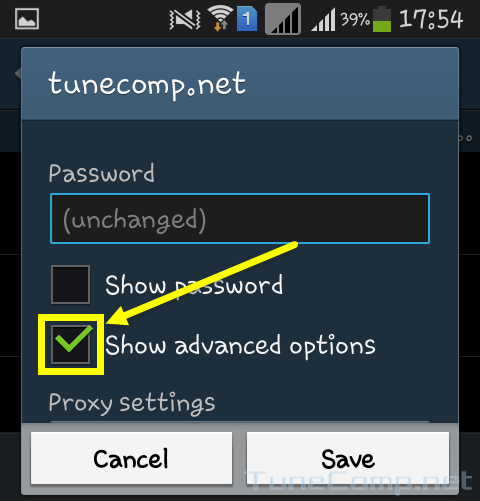
- Set the checkbox Show advanced options.
- In the IP settings switch to the Static option.
- Now manually specify IP address, gateway IP, DNS.
- Don’t forget to tap Save for new static IP address to apply.
Static IP-address assignment on Android 4.2.2 (Touchwiz)
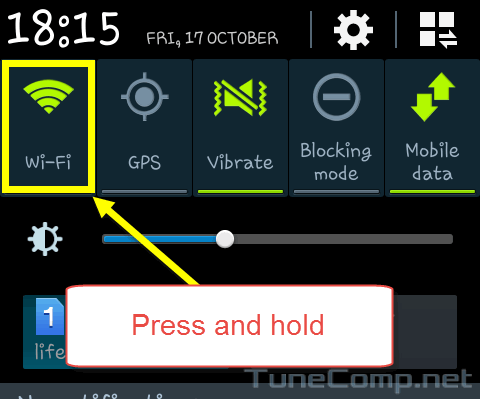
1. Pull down the status bar.
2. Press and hold the Wi-Fi icon in the quick panel:
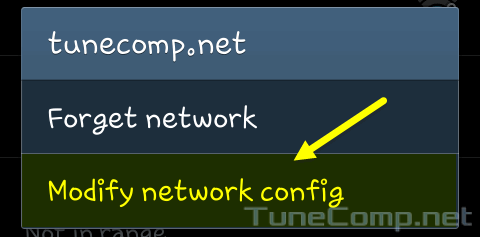
3. Perform the long press on your network name:

4. Tap on Modify network config:
5. Set the checkbox Show advanced options:
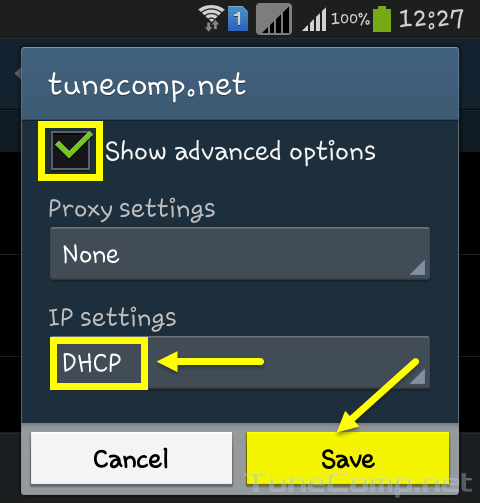
6. In advanced options area:
- Select Static in IP settings drop-down menu .
- Specify the desired address in IP address field .
- Tap the Save button to apply new settings:

Do not forget to specify the Gateway IP address when using a static IP settings. Otherwise you won’t have the Internet connection on your Android!
How to Switch Back to Automatic IP Address Obtaining
If you wish to obtain an IP-address automatically again perform the following actions:
Go to network config again:
Make sure the checkbox Show advanced options is set.
Select DHCP in IP settings drop down menu.
Press Save:
After that your device will reconnect to the network and obtain the IP from DHCP server.