Contents
Metered connection mode is designed for using with mobile modems, tethering or another internet connections where the traffic is limited (or is NOT unlimited). The purpose is traffic saving.
What will change in case you enable the feature? In this mode Windows won’t download updates, so you can use this option to postpone the installation of updates.
Here is an example. It is reasonable to tell Windows 10 to treat your Wi-Fi connection as metered in case if your laptop is connected to the mobile hotspot of your smartphone. This will make Windows 10 upload and download less data to prevent wasting your cellular data in vain.
How to Set a Wi-Fi Connection as Metered in Windows 10
Here is the easiest way if you want to restrict data for your wireless connection:
Click the network icon in the Taskbar.
Right-click your Wi-Fi connection.
Select “Properties”.

Toggle on the feature.
Note, that you will be able to open the properties of a Wi-Fi network in case if you are currently connected to it or you already have its profile saved.
This means that you can change this setting for inactive hotspots as well. Even if they are not in range at the moment.
Alternative Method for Setting Wi-Fi or Ethernet Connection as Metered
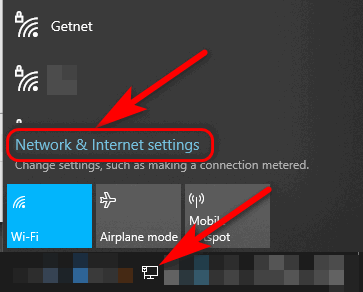
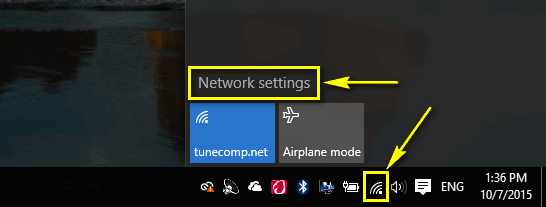
First, click the network icon in the Taskbar.
Then, click the “Network and Internet settings” link. The Settings app will show up.
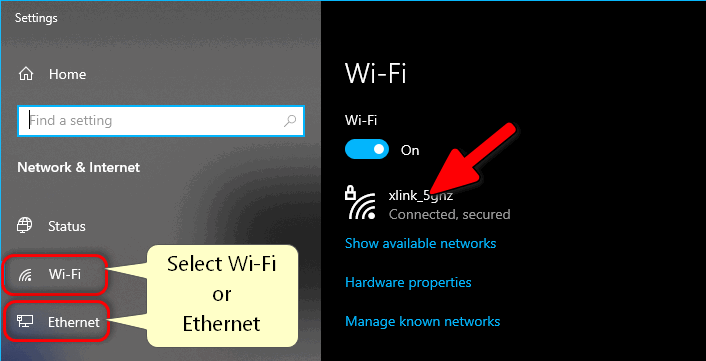
Select “Wi-Fi” or “Ethernet” in the left pane depending on what type of connection you wish to limit data throughput for.
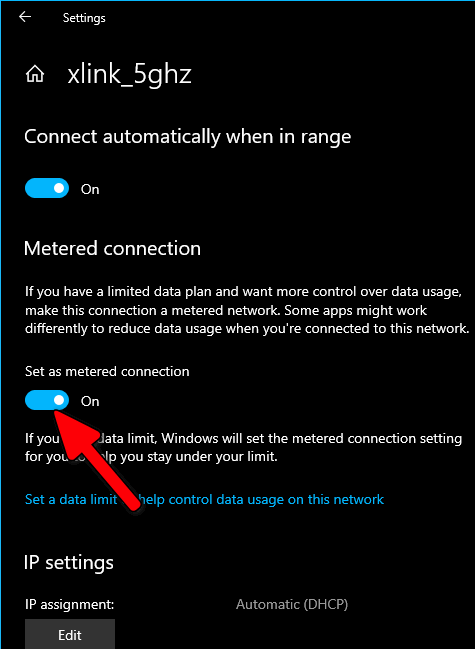
Click on your connection in the right part of the Settings app.
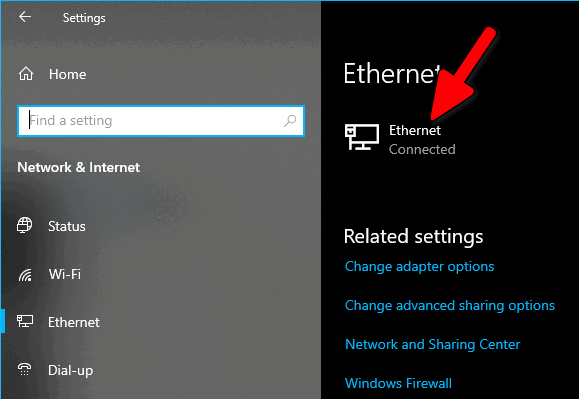
If you want to reduce data usage for your Ethernet connection, click here:
If you don’t see any, make sure you are connected to a Wi-Fi hotspot or plugged the Ethernet cable into your network adapter.
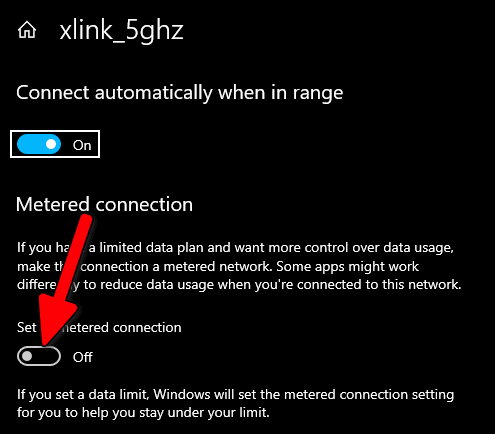
Toggle on the “Set as metered”.
Steps for Old Windows 10 Versions
First, click the network icon in the taskbar.
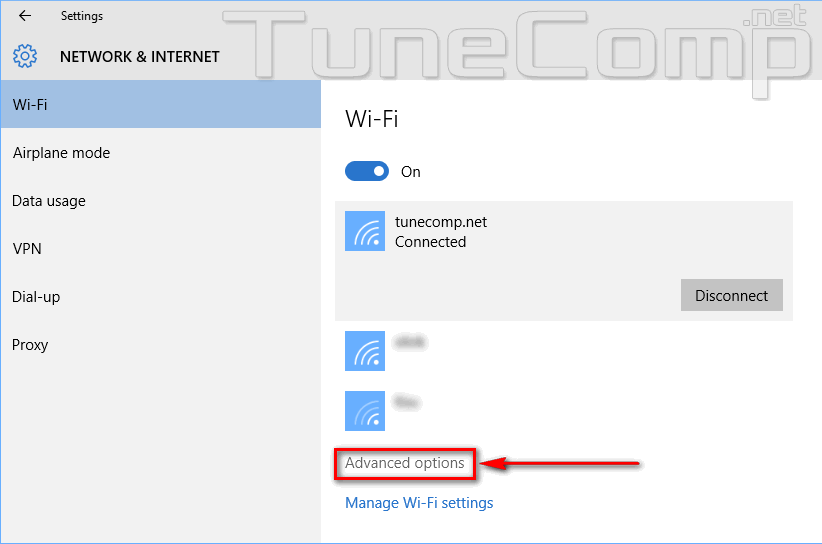
Then, go to Network settings:
Select Advanced options:
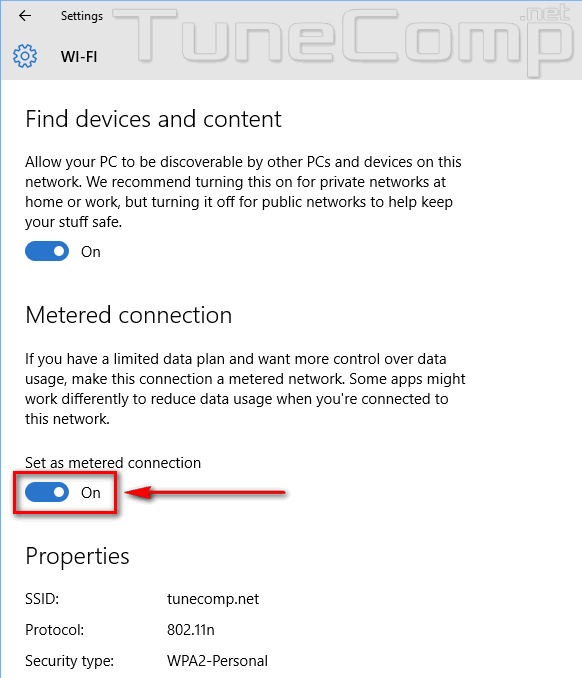
Turn on the metered connection mode:
Done! From now on Windows 10 will reduce data usage when you are connected to this network.