
Contents
In this article I will explain how to make your Hyper-V virtual machines accessible from non-management host computers or other devices connected to your home of office network (LAN).
For that purpose you need to create an external virtual switch in Hyper-V Manager . And this is the article is actually about.
Internal Switch is a pre-installed virtual switch. It serves to connect a virtual machine to the management host machine and Internet.
External Virtual Switch serves to bridge the internal VM network to the real LAN so that other computers, servers, Android and iOS devices can access your Hyper-V machine. It is not pre-installed. You need to create it manually.
Part 1 – Create an External Virtual Switch
- Launch the Hyper-V Manager:

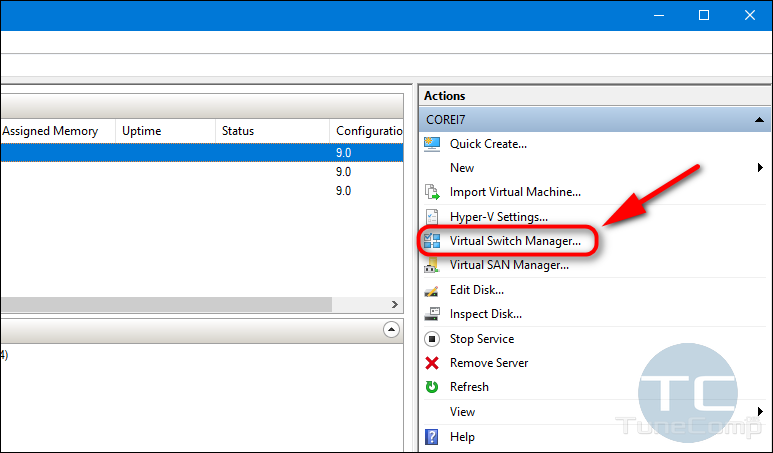
- Click on the Virtual Switch Manager link in the right pane:

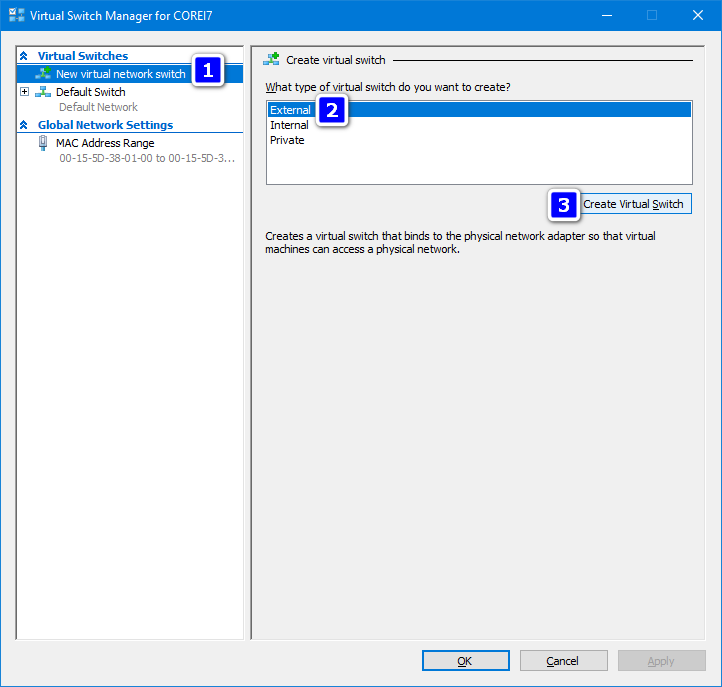
- In the left pane select New virtual network switch;
- In the right part of the window select External;
- Click Create Virtual Switch:

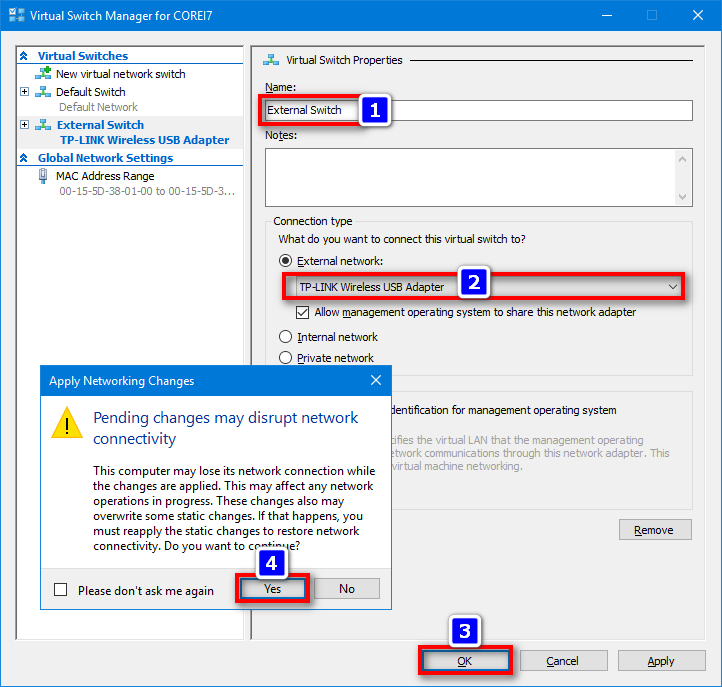
- First, give it a name that will be clear to you. For instance, External Switch.
- Now is the most important part of the work – select the proper real network adapter for switch to bridge to. I want my virtual machine to be bridged to my Wi-Fi adapter.
- Click OK to apply networking changes and Yes to confirm. The network and Internet connection on your management host will disrupt for a few seconds:
Part 2 – Select the External Switch in the VM Properties
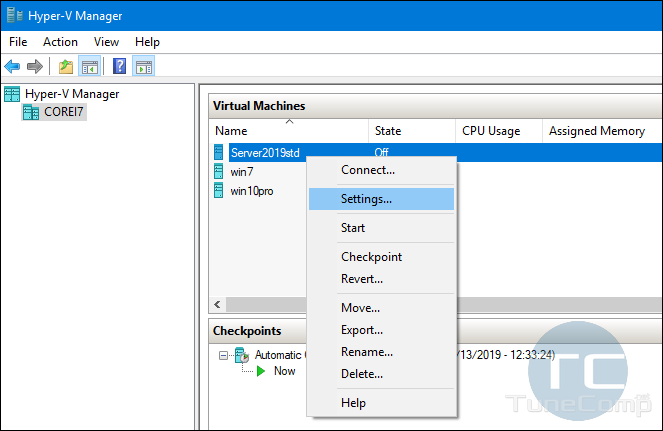
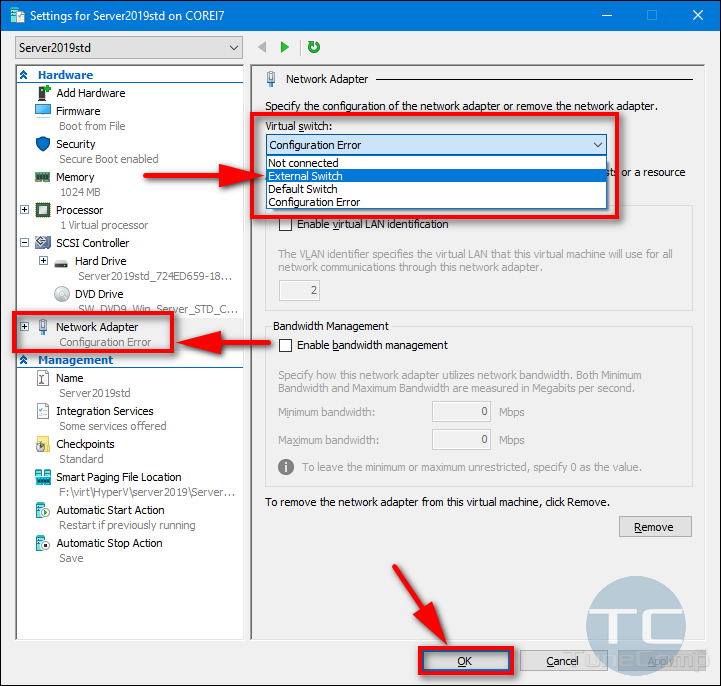
- In the Hyper-V Manager right-click the virtual machine and select Settings:

- In the left pane select Network Adapter.
- In the Virtual switch on the right select the external switch you created in the previous step.
- Click OK to save VM settings:

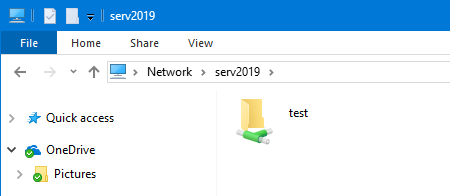
Checking the results
Now we can start our VM, let it boot up, obtain the IP-address from our router’s DHCP server and begin checking from another (non-management!) PC connected to our local area network.
First, I would like to open the network shared folder:
Then, let us connect to the Hyper-V VM via Remote Desktop:
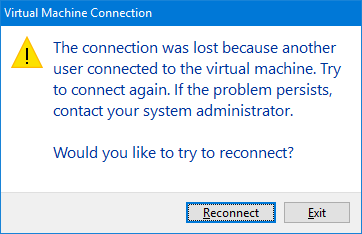
Everything’s working fine!
Important! Be advised, that you can also set up a port forwarding rule on your gateway (for instance, a wireless router) to access your virtual machine remotely from any place on the planet.
Wrapping Up
Today we discussed a rather important topic. And hopefully now you will be able to set up a remote access to any VM in a few seconds. In such a way you can create as many virtual Remote Desktop or file servers as you wish on your host machine.
If you have any questions, ask them in the comments section. I will try to help. Good luck in using Hyper-V on Windows 10 or Server.
I am trying to achieve this but no success.
When connecting from LAN (another PC or hyper-v host too) I get response always from host IIS, not from client…. do you have any hint why request is not forwarded to virtual client?
Internet connection from client works without problems…
Thx
Frankly, I don’t know why this happens. Maybe, something is wrong (or different) in your Ethernet card driver…
Hello, I’ve made a config like you. I can ping from my guest to other machines in my network. But… I can’t get that the guest and the host communicate each with other one! Any suggestion or advice?
Once you’ve made your machines communicate, you need to configure the network access as we wrote here.
Thank you for the tutorial. This is what happens when I created a virtual switch:
1. Virtual machine is not connected because of an invalid IP address
2. Host machine shares the virtual switch and the host’s internet connection is lost.
How can I resolve this?
Ok simple to simple but why the hell i connect to ethernet and not vethernet and why the virtual adaptor doesn’t have a gateway??
Thanks, those simple instructions worked for me!
Work with my setup as well. Have a powerfull Host and a couple of VMs (Linux,Win 10,Win 7). My wife works Remote and i need to do the same for my work. So She works on the Host and i have connected remote to a Windows 10 VM. Nice Job!!!! THANKS
Thank you very much. No other video or article on the Internet explains this topic so simply and so accurately. Well documented. Excellent job!
Carlyle