Contents
One of the most popular questions concerning networking in Windows 10 is “How can I share a folder on network?” Because it is very convenient to use shared folders on the home LAN. For instance, you can use your desktop with 8 TB hard disk drive as a NAS or file server. Thus, you won’t need to download the video to your phone or laptop to watch it. Besides that, several people can view and edit the same documents if you share the folder where it is located. You can set up permissions to read only or full access allowing to modify files from remote devices. Here is our simple step-by-step guide on how to set up network access without setting up a homegroup in Windows 10 and share a folder to everyone on your LAN.
By the way, Microsoft is going to kill the Homegroup feature in the upcoming versions of Windows 10.
Set Up Network Access on Windows 10 and Share a Folder Without Creating Homegroup
Step 1. Enable network discovery and turn off homegroup-based access
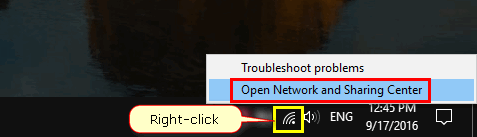
- Right-click the network icon and select Open Network and Sharing Center:

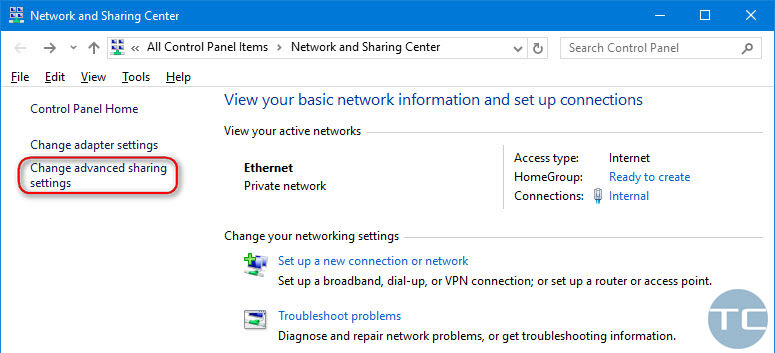
- Click on Change advanced sharing settings:

- In the “Current Profile” section select:
– “Turn on network discovery“,
– “Turn on file and printer sharing“,
– “Use user accounts and passwords to connect to other computers“:
- In the “All Networks” section select “Turn off password protected sharing“:
- Click “Save changes“.
- Sign out to apply changes (or just reboot your PC):


Step 2. Configure folder sharing for everyone
Here is how to share a folder in Windows 10. In our example we will show you how to share a folder for Everyone (for all users even those who don’t have an account on your PC).
- Right-click on the folder you want to share for your local area network.
- Select “Properties“:

- Go to the “Sharing” tab.
- Click on “Advanced sharing“:

- Set the checkbox “Share this folder“.
- Then click “Permissions“:

- Specify full access or read-only access for “Everyone” and click “OK“:

- Now go to the “Security” tab.
- Click “Edit“:
- Click “Add“:
- Type “Everyone“:

- Now click “OK“, “OK” and “Close“.


As a result, you can access the folder shared on the PC running Windows 10 from another machine on the LAN without entering any user credentials: 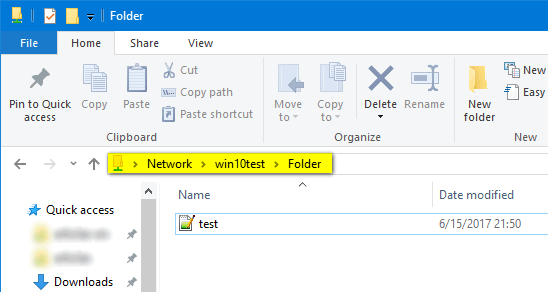
I hope, this article was helpful to you.
This article needs to be updated to reflect the April Win 10 Update. It was obviously written using a build prior to the latest which is now the current release.
If you are writing instructions for a multi-computer feature or procedure, please state which instructions apply to which computers
Do not show how to do between win 7 and win 10, both on same computer….without net;
for example, sharing Onedrive folder….both OS use the same account (..can be different accounts) and do not need to have two folder on disc (same PC) with the same info,….waste of space and time…..Dropbox can do that.
Doesn’t work. My machine looks totally different and doesn’t have those options, although it’s Windows 10. Still no way to get my two computers on the same network to talk to each other. How can something so blindingly obvious and necessary be so difficult? Microsoft sucks, that’s how. Now I can share it … how?
I am so tired of seeing out of date help. Since MS got rid of HomeGroup I have had nothing but problems setting up my network. MS even set it up one time for me, but I keep loosing it. Almost everytime they do an upgrade. Just wish I could get some up to date info (step by step) on how to do this.
I am very sorry, but we are unable to keep all our guides up to date, especially when Microsoft is constantly changing Windows 10.
Sick of all the crap Micro$oft keeps removing from Windows 10? There is a much easier solution to the problem of sharing files between Windows 10 PCs, and it works great for me. Invest in a Network Attached Storage (NAS) unit for your local LAN. Run everything to other PCs by moving it through the NAS. Every PC will always be able to read and write to/from the NAS, without any of the paranoid “permissions” BS. It’s also a great way to store file backups off your PCs, yet still have easy access to them without dealing with proprietary file systems.
yes, is there anything more pathetic on the entire world of computing other than the fact that windows makes it nearly impossible to set up networks with the home version of windows 10. Sure, if you pay 100$ you can get pro and it works, but not for the typical home copy. Microsoft engineers should be utterly ashamed to work there. It is absolutely shocking and beyond belief that microsoft fails on this. What is more basic than sharing files between home computers. Microsoft you are pathetic and you should be embarrassed.
MS engineers have been s*** since the XP op system was replaced (best Op Sys MS ever wrote!). Every Op Sys since then takes more and more control away from the user and forces more and more intrusions from MS. This latest idiotic move to take away Homegroup is so STUPID and MORONIC that whomever made that final decision should be fired, then tarred and feathered in some public forum! IDIOTS!
Hi Tune (article author),
I looked at this in May 2020 and it helped me create network folders on my home network so thank you very much.
To the People moaning above – his instructions are spot on its just windows has changed how you access some of the different settings. Not helpful, I completely agree, but you can still achieve what your after with these instructions and using the windows search feature to find the different settings.
Hi,
Thanks for producing this – it worked fine for me. Those who complain should try writing their own!