
Contents
Many of you for sure got used to the number row on your Android virtual keyboard. However it is not activated by default on Google Pixel and Pixel XL.
The dedicated row of digits allows you to quickly type digits without need to switch to another page. However, in this case, the keyboard takes more space and covers more area of your screen.
Anyways, here is how to enable the number row in Google keyboard (GBoard) on Pixel or any other device with this app.
With this feature enabled you don’t have to switch to another page or long tap the letters in the upper row when you need to type a digit.
Personally I need this option badly because I use to type IP-addresses thousand times a day every day. If you are like me maybe you will decide to tweak your GBoard too.
Method 1. Show Number Row in Google Keyboard When Typing
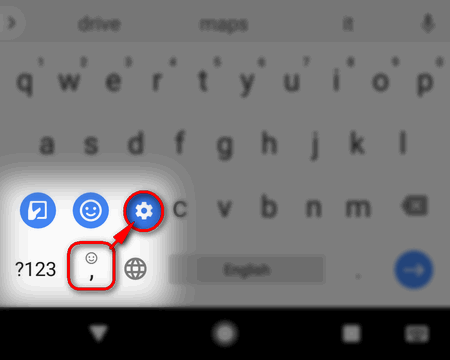
- Tap and hold the “comma” button.
- Drag your finger to the “Gear” icon and release to open the Settings of Google Keyboard:

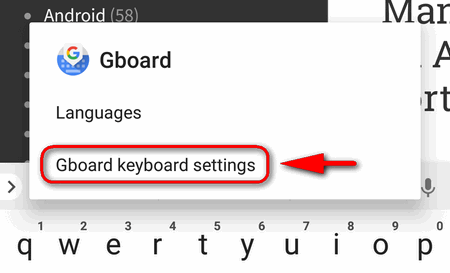
- Tap on “Gboard keyboard settings”:

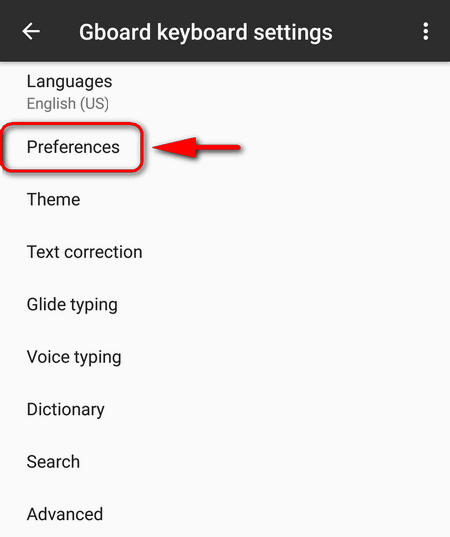
- Tap on “Preferences”:

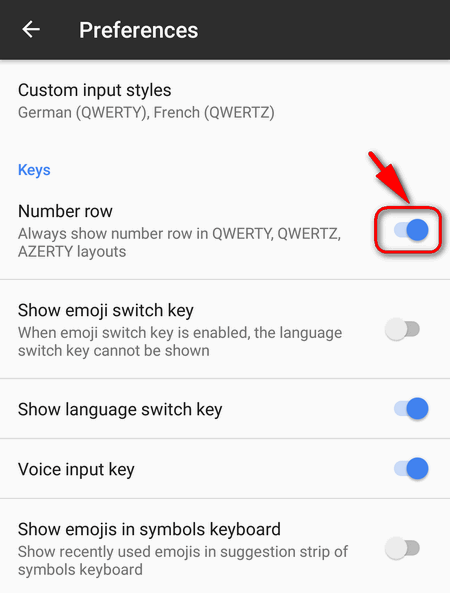
- Switch on the “Number row” toggle:

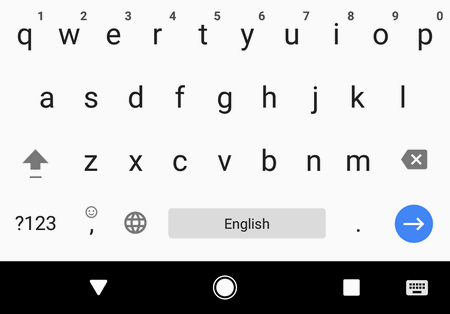
Here is how it looks like now:

How it looked like before:
Method 2. Add Number Row to GBoard Using Android Settings
- Go to “Settings”:

- Scroll down to the “Personal” section.
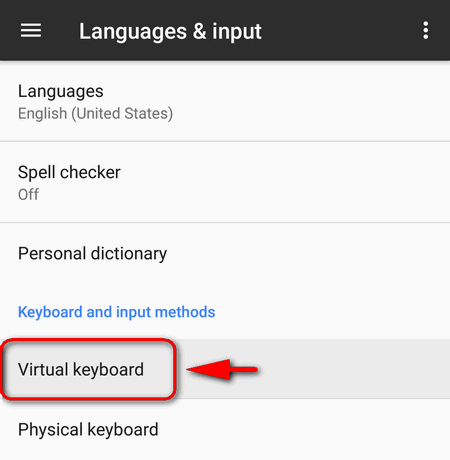
- Tap on “Languages and input”:

- Tap on “Virtual keyboard”:

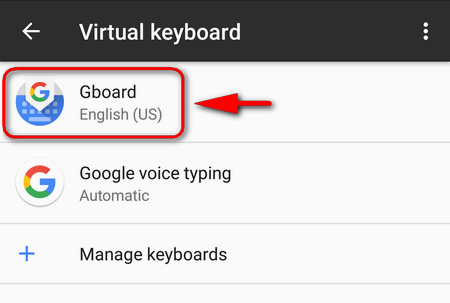
- Select “Gboard”:

- Select “Preferences”:
- Enable the “Number row” option:

That’s it! Now you can enjoy using your favorite layout of GBoard that is so familiar to you.
We recommend to read: How to Add Another Input Language on Android 9, 8, 7, 6