Contents
AHCI (Advanced Host Controller Interface) mode is a communication mode that serves to connect storage devices using SATA interface with the support of NCQ and hot plug features.
On practice this mode often provides faster read/write speeds while using HDDs and especially SSDs.
Quite often users find that they have AHCI disabled and try to enable the mode in UEFI (BIOS) but get the BlueScreen issue with the code Inaccessible_boot_device.
Below we will explain how to check if AHCI mode is enabled and how to safely enable it without reinstalling Windows 10 or 7 and avoid BSOD.
Why You Need to Have AHCI Enabled For SSD
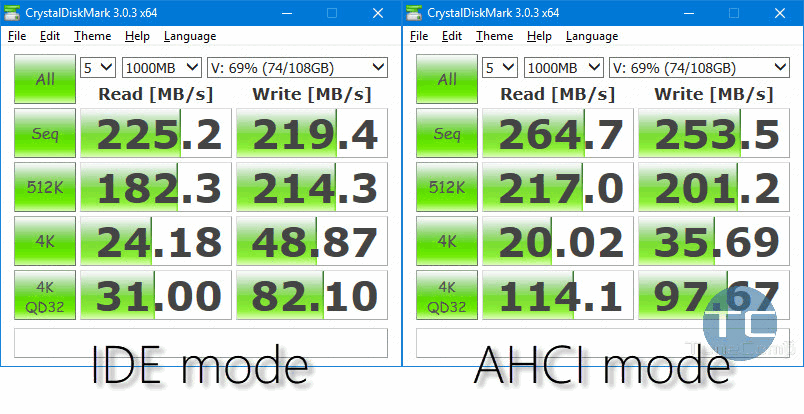
Don’t think that AHCI mode is useless for you. I know why you think it is – because someday you tried to enable it when you were using a classic HDD (Hard Disk Drive) and AHCI did not boost the speed.
But it works for SSD!
Even if you have an old SATA 2 controller you will feel the difference in read and write speeds when you enable AHCI mode. Look at the SSD performance comparison on my old HP G62 from 2011:
How To Check Whether AHCI Is Enabled Or Disabled
- Open the Device Manager.
- Expand the IDE ATA / ATAPI Controllers.
If you see AHCI Controller in the list, you have it enabled:
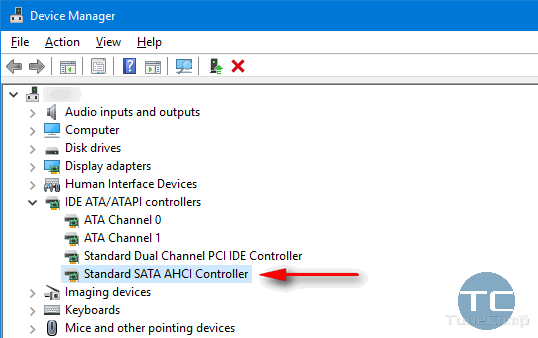
If you see only ATA and IDE words you are likely to have AHCI feature disabled on your machine!
How to Enable AHCI On Windows 10 After Installing
If you have already installed and set up your Windows 10 with your SATA controller running IDE compatible mode don’t be upset! You can switch to AHCI in a few steps.
To be on the safe side, it is advised to back up your Windows 10 using AOMEI backupper before you start tweaking the registry.
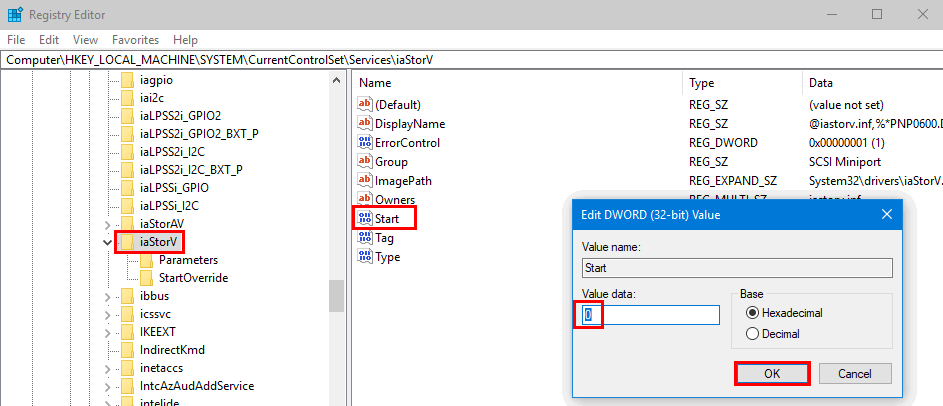
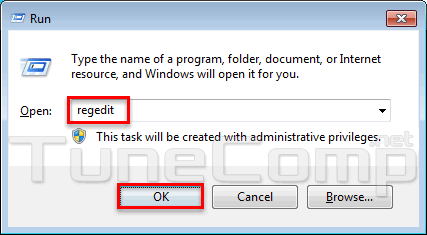
Launch the registry editor (Win+R, type regedit, press Enter) and perform the following actions:
- Go to
HKEY_LOCAL_MACHINE\SYSTEM\CurrentControlSet\Services\iaStorVand set the value namedStartto0:
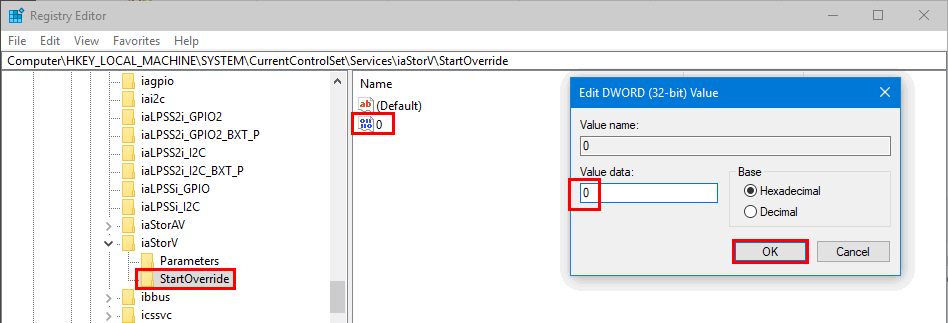
- Find the key
HKEY_LOCAL_MACHINE\SYSTEM\CurrentControlSet\Services\iaStorAV\StartOverrideand set0to0:
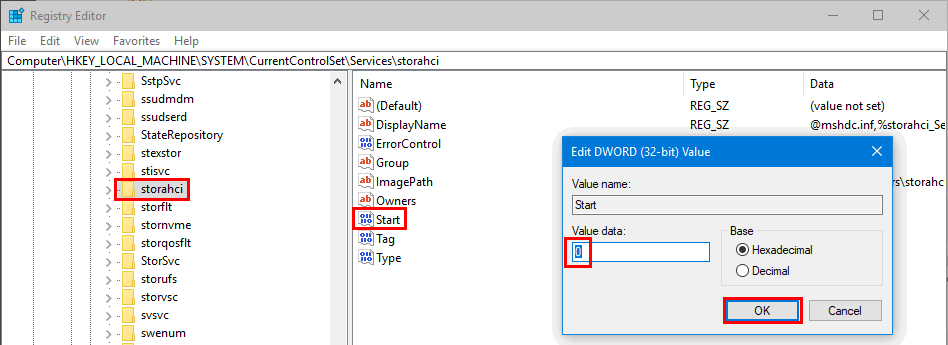
- Go to
HKEY_LOCAL_MACHINE\SYSTEM\CurrentControlSet\Services\storahci\and setStartto0:
- And finally find the last key
HKEY_LOCAL_MACHINE\SYSTEM\CurrentControlSet\Services\storahci\StartOverride\and set0to0:
- Reboot your system.
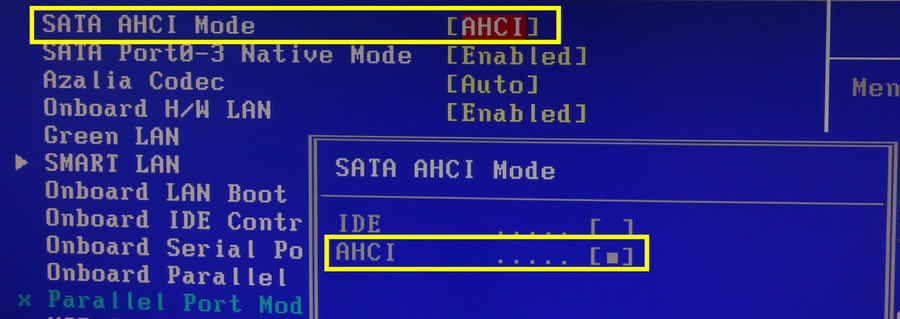
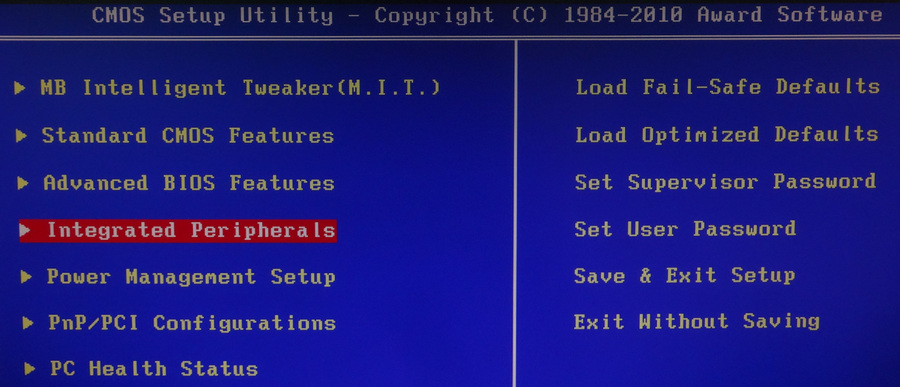
- Go to UEFI/BIOS and enable AHCI mode.
Here is how it looks on an old desktop with AWARD BIOS. You need to go to Integrated Peripherals: find
find SATA AHCI Modeand switch it toAHCI: Save UEFI (BIOS) settings and reboot your PC.


Enable AHCI Mode In Windows 7 Without Reinstalling
- Launch the registry editor:

- Navigate to:
HKEY_LOCAL_MACHINE\SYSTEM\CurrentControlSet\services\msahci
- Set the
Startvalue to0:

Hello,
Thanks for your article.
On my old ASUS K70iC, I didn’t see the “Standard SATA AHCI Controller” in Device Manager.
So I went into the registry. But I only see iaStorV and iaStorAVC, no iaStorAV.
What can I do in this case?
Thanks in advance for your help !
Pierre