Contents
Many of you use Remote Desktop feature to access your home or work computers running Windows 10. All you usually need to do to implement this is set up a port forwarding rule on your router.
You can receive incoming connections on any port and direct them to RDP port of the Windows workstation on the LAN. But what to do if your PC is connected directly to the Internet without a router? How to configure the remote access and stay secured? The answer is – change remote desktop port in Windows settings.
By default, Remote Desktop uses port 3389, which is a commonly known fact. Consequently, hackers can scan the default RDP port and if they receive a login/password prompt they can start brute force attack and ultimately gain access to your PC via RDP.
Here is how to change Remote Desktop Port on Windows 10 to some non-standard value to improve security and evade from brute force attacks aimed at default one.
How To Change Remote Desktop Port Number On Windows 10 (RDP, Terminal)
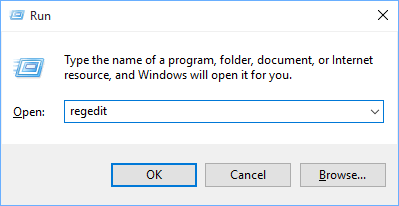
- Firstly open the registry editor (press Win+R, type regedit, press Enter):

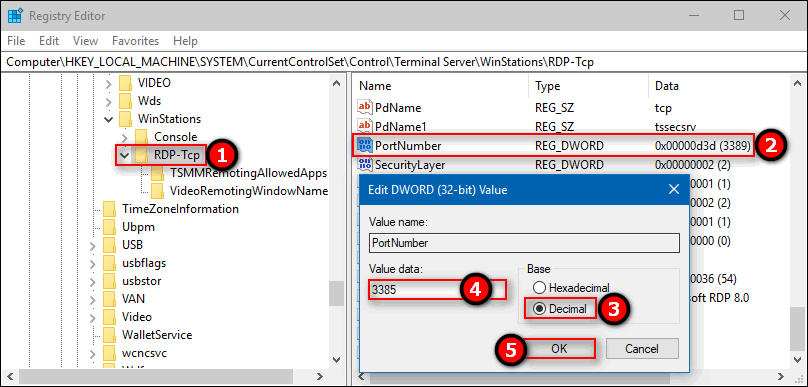
- Then navigate to
HKEY_LOCAL_MACHINE\System\CurrentControlSet\Control\Terminal Server\WinStations\RDP-Tcp
- Here find and double-click on the PortNumber value.
- Switch it to Decimal mode
- Now change the default port from 3389 to your preferred number. Perhaps, I wish it to be 3385:
- And click OK to save:

- Finally reboot your computer for changes to take effect.
Let’s Check The Access Using the New RDP Port
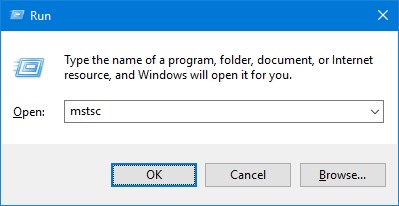
- Press Win+R.
- Type
mstsc
- Hit Enter:
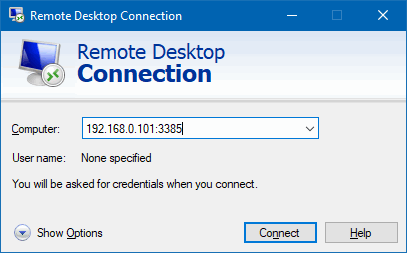
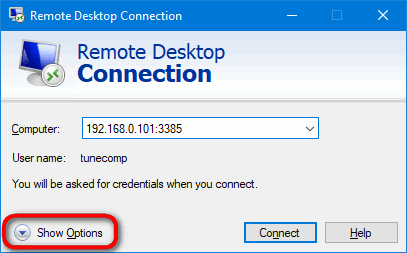
- Type your remote server’s IP or hostname and new port number through the colon. Just like this: 192.168.0.1:3385
- Hit Enter to connect:

Once more: we don’t recommend to use RDP session without setting up OpenVPN or VPN. But changing the default port for Remote Desktop service will make a possible hack a bit more difficult as hackers use to scan/attack standard ports to gain access to your PC or server.
And the last tip: if you are using a shortcut to access your remote desktop server, don’t forget to save its new version with the new port number (otherwise you may not be able to connect anymore). To create a new RDP shortcut or update existing:
- press Win+R, type mstsc (from deprecated “Microsoft Terminal Server Client”) and press Enter to launch RDP dialogue:
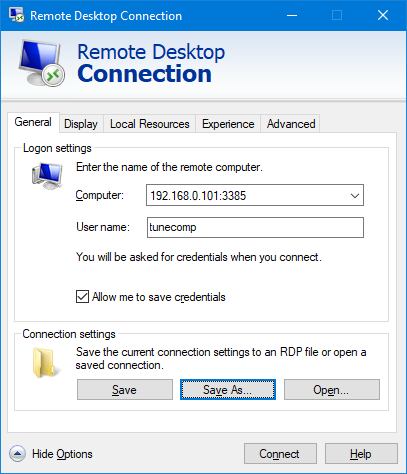
- here click More Options:

- now you may optionally enter your user name and, if you wish, even check the flag Allow me to save credentials and then click Save as:

- Create a new RDP shortcut or replace the existing one.
That’s it! Now you know how to boost your security by changing the RDP port on Windows 10, 8 and 7.
thx. is work on win7 but d’t on win10
On Windows 10, when you change the port number, I found the OS does not create a new firewall rule to allow the incoming connection on that port. If you turn the firewall off you can connect. You have to create a new Inbound Rule to allow incoming TCP traffic to your new port number