Nowadays the majority of computers are connected to the Internet. Usually PCs connect to wireless router via Wi-Fi or Ethernet and router serves to supply the Internet.
In most cases computers are configured to obtain an IP-address automatically because every router has a built-in DHCP server that serves to assign local IP to every device on the local area network (LAN).
But in some cases you might need to assign an IP-address manually. It is also called a static IP-address. The simplest example when you may need to use a static IP — while you are configuring your router or access point itself. And here is how to configure it on Windows 10 PC.
We will show the process on Windows 10 version 1803.
Be advised that Windows 10 is a constantly changing system. As the time goes on the configuration settings and applets are being migrated from the deprecated Control Panel to the modern Settings app. That’s why the old manually may not work for a newer version of Windows 10 OS.
How to Assign Static IP Address for Ethernet Adapter in Windows 10
Follow the steps on your computer:
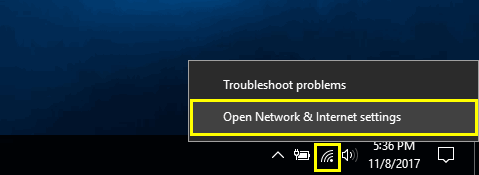
- Right-click the network (or Wi-Fi) icon in the Taskbar.
- Select Open Network and Internet settings:

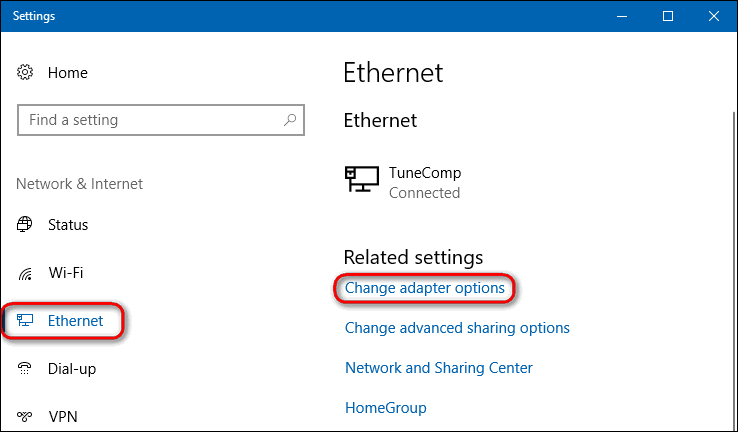
- Go to Wi-Fi or Ethernet (it doesn’t matter).
- Scroll down a bit and click on the Change adapter options link:
 Once you’ve done it, you will be taken to the Network Connections section of the Control Panel.
Another method to reach the Network Connections setting is to go to Control Panel → Network and Sharing Center and select Change adapter settings.
- Right-click the network connection you need to set a static IP-address for and select Properties.
- Select Internet Protocol Version 4 (TCP/IPv4) and click on the Properties button:

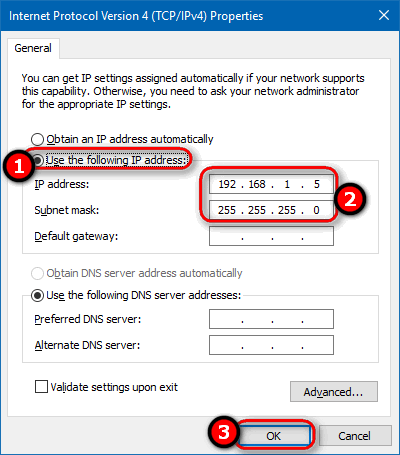
- Switch the selector to Use the following IP address.
- Type the IP-Address and the subnet mask and clock OK:

 Once you’ve done it, you will be taken to the Network Connections section of the Control Panel.
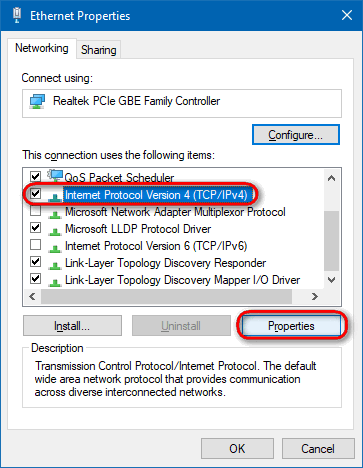
Done!
Please, tell us in the comments whether or not these steps worked for you. Thank you.
Worked great – Thanks!