Echo request (a.k.a. ICMP packets or ping) serves to discover whether or not the network device is present on the network (LAN or WAN). It can be used to ping computers, laptops, servers (including website hosting ones), network printers, routers, etc. However, the ping response should be enabled in advance for the network device to be able to reply. Otherwise, you will get Request timed out instead of response.
Unfortunately the majority of users go and disable Windows Firewall when they want to allow ICMP response to have Ping command working. They forget about the fact that the Firewall protects their PC from hack and malware and it is a must when working in public networks. Here is how to do the right way.
How to Allow Incoming Ping (Echo Request) Without Disabling Windows Firewall in Windows 10
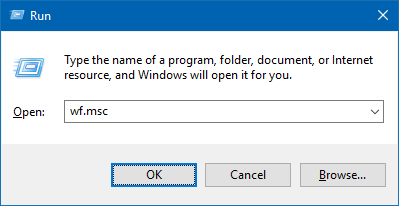
- Press Win+R.
- Type wf.msc.
- Hit Enter:

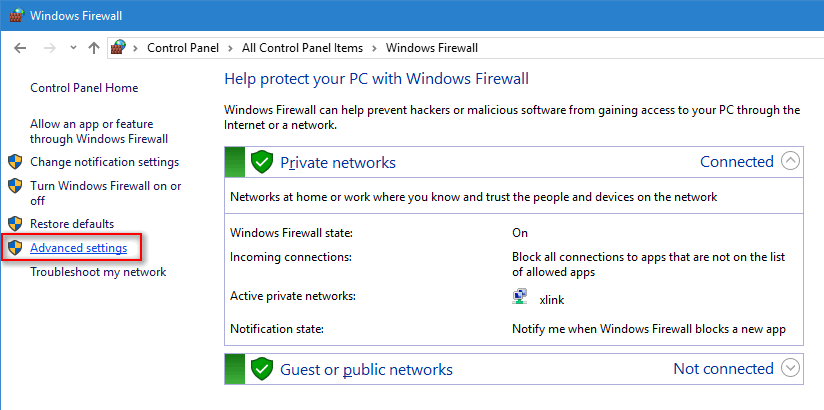
- Click on the Advanced settings link in the left part of the window:

- Select Inbound Rules in the left pane.
- Enable the rule named: File and printer sharing

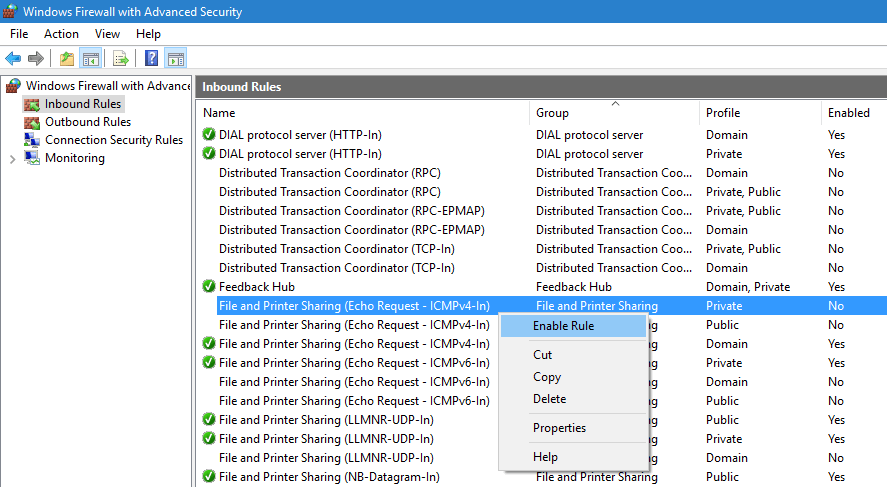
Note, that you can allow pings for Private, Public and Domain types of network independently. If you have separate rules preinstalled for each type, enable those you need. Otherwise you can double-click the rule to call its properties, go to the “Advanced” tab and specify network profiles:
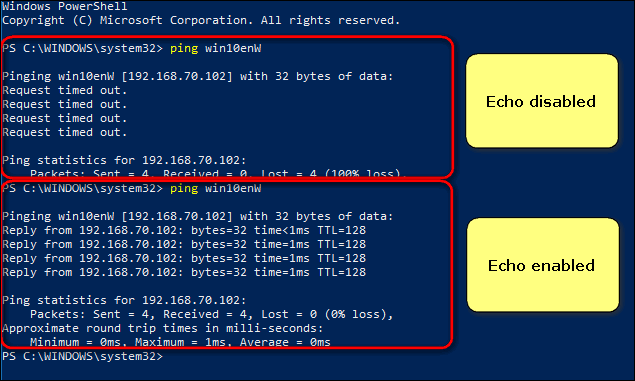
Now your PC will respond to ICMP packets when pinged from another device. Just like this:
Hope, this will be helpful to you.