Contents
We encountered a clicking sound issue on Windows 10 x64 right after reinstalling operating system with Creators Update. In our case the solution was very simple but it can be much more difficult to troubleshoot the issue in other cases. Here is about all possible solutions to fix clicking, popping or stuttering sound in Windows 10.
Before you begin troubleshooting
Make sure you don’t have such obvious causes of system slowing down, capable of making the sound pop, click or stutter, as malware or high CPU load by some programs.
In particular, ensure you are not running Virtual machine (especially on Virtualbox) or you don’t have some difficult tasks (like backing up, moving files, defragmentation, streaming, etc) running in the background.
Because if you are currently running some apps that burden your CPU you will have bad latency and you will definitely hear stuttering sound.
Fix clicking or popping sound in Windows
Solution 1: Switch Windows to High Performance profile (worked in our case)
On some systems it solves the clicking sound issue at once. This can be explained as a bad drivers implementation for Windows 10. You can have two different computers with fresh Windows 10 and the issue will exist only on once of them because of hardware peculiarities. In our case we had clicking sound on Realtek ALC892 using the latest Realtek HD driver for Windows 10 x64 from the official website. However, the PC was rather old – on Socket 775 Intel Core 2 Quad Q9500.
- Right-click on the Start button.
- Select “Power Options”.
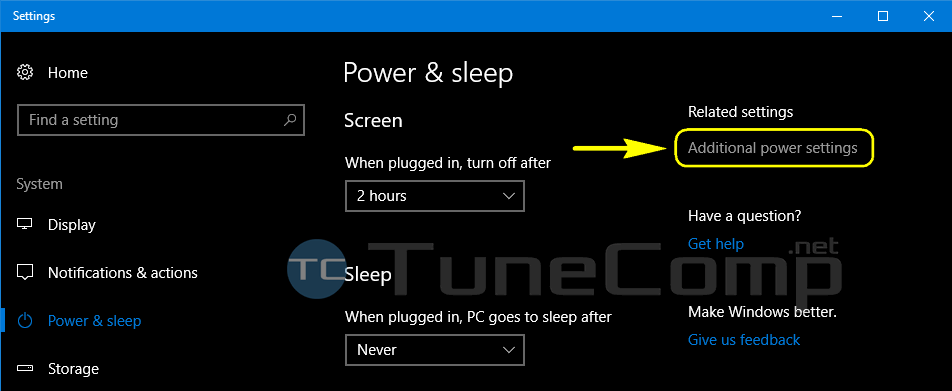
- Click on the “Additional Power Settings” link in the top right corner:

- Switch to “High Performance”:

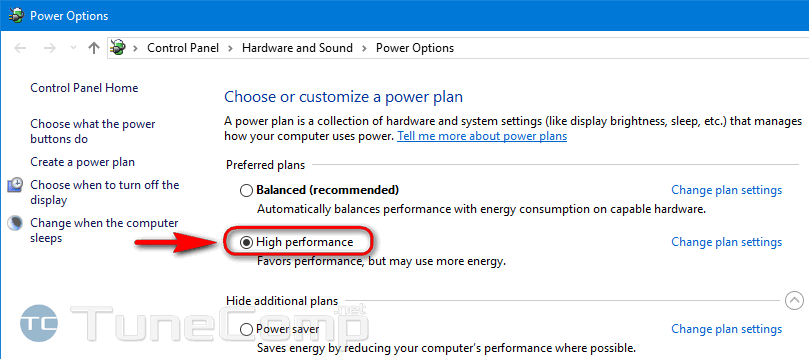
This can solve the issue when it is about the drivers and priority of audio stream.
Solution 2. Disable throttling
Throttling can also be the reason of clicks or pops on your audio. The thing is CPU is able to decrease its frequency. For instance, when CPU load is 60% it works on maximal frequency but when the load is 5% it decreases and the sound begins stuttering. We advise you to install CPU-Z utility from its website cpuid.com and check your processor’s frequency – is it on maximum and does it change or stable?
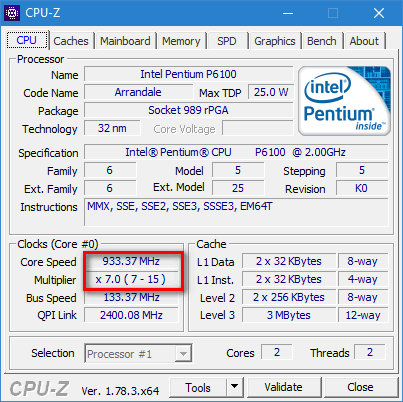
If you see that the CPU frequency is changing, try the following:
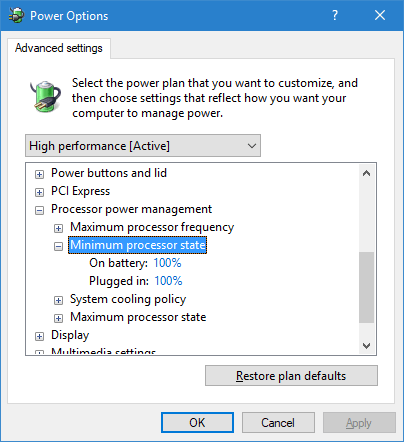
- Go to “Settings” > “System” > “Power & sleep” > “Additional power settings” > “Change plan settings” > “Change advanced power settings”. Scroll down to “Processor power management”, double-click on it and make sure the minimum processor state is 100%. If you have a laptop, then also pay attention to the battery mode if you need to disable throttling when working on battery:

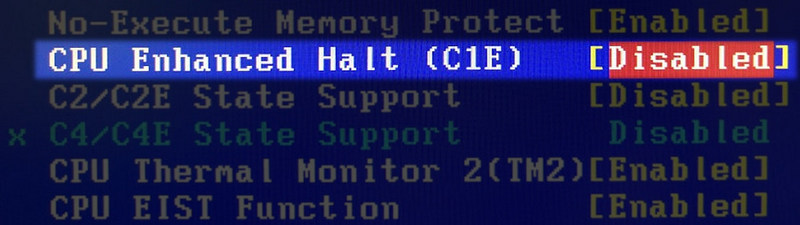
- Also disable C1E State in BIOS:
Solution 3. Install Intel DPTF Driver
Intel® Dynamic Platform and Thermal Framework (Intel® DPTF) driver serves to control CPU temperature and manage throttling mode (including so called Adaptive Performance). Visit the official website of your hardware vendor and check if DPTF driver is available for download. Some users report they managed to fix the issue by installing DPTF Driver for Windows 8.1 on Windows 10.
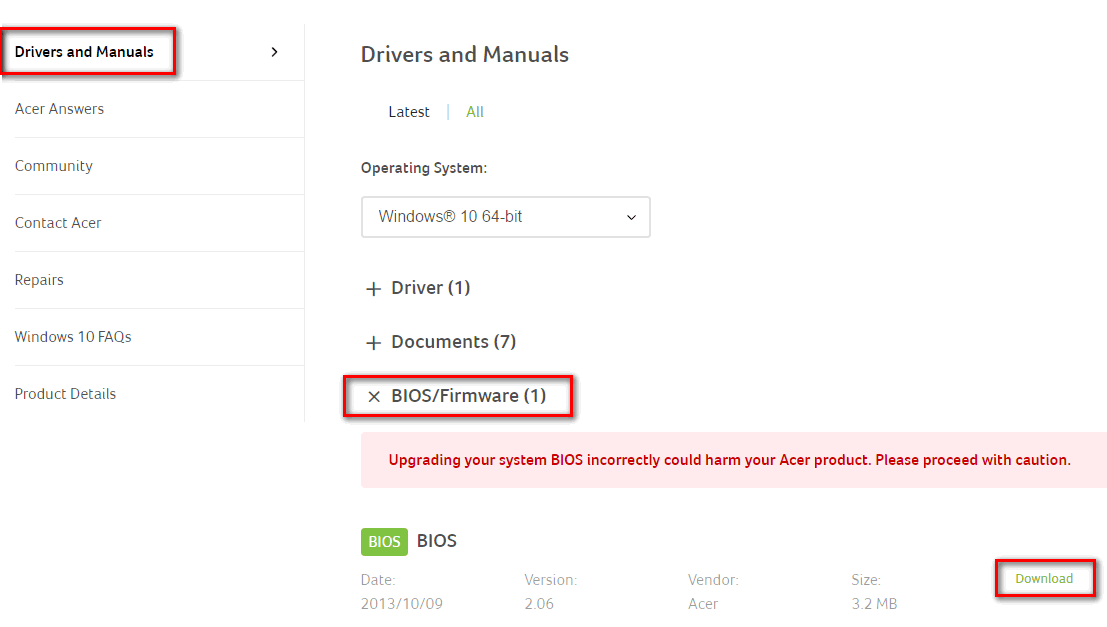
Solution 4. Update BIOS (UEFI)
Especially this relates to Acer (and eMachines) PCs and laptops. Before doing something to solve the clicking and popping sound issue go to the official website, download the latest BIOS for your exact model and flash it:
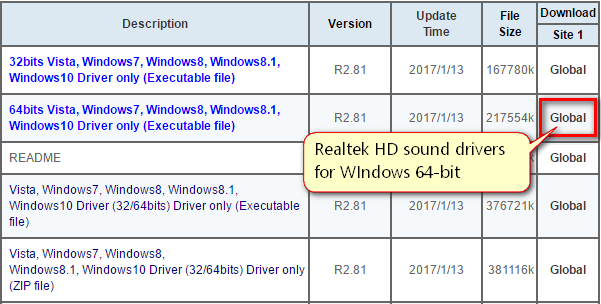
Solution 5. Update Drivers
You should install the latest drivers for your Sound Card And Graphics Card as well. So visit official websites and download the latest versions of drivers for exact models or your equipment.
Solution 6. Modify Audio Settings
If the previous solutions didn’t work for you, you are likely to have bad sound drivers implementation. The following steps may help to get rid of stuttering and clicking sound.
- Right-click the speaker icon in the Taskbar.
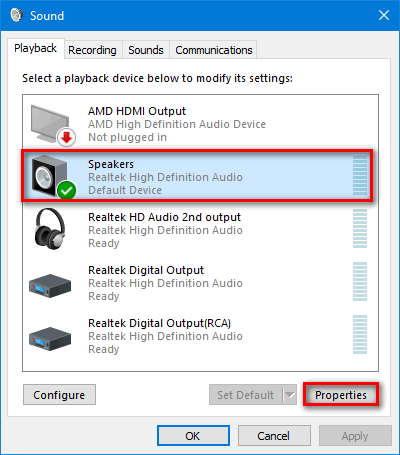
- Select “Playback devices”:

- Select your current output. Usually, it is “Speakers”.
- Click on “Properties”:


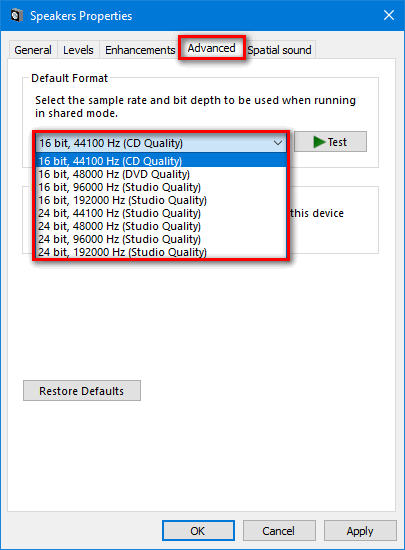
1) Try selecting the simpler format
In most cases you won’t need Studio quality sound. So CD audio will be enough.
2) Try disabling sound effects (enhancements)

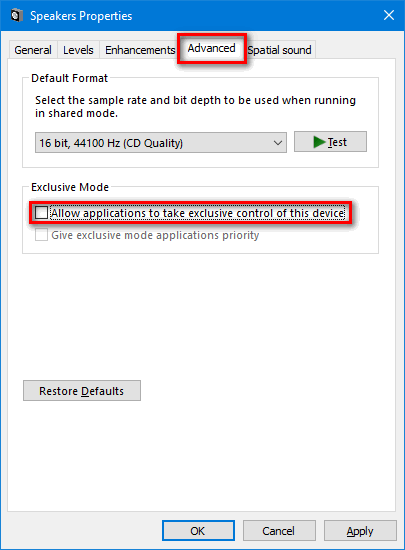
3) Try turning off exclusive Mode
How to Diagnose Sound Latency Issues
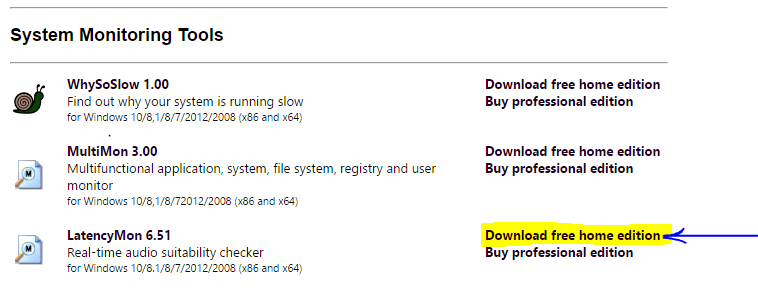
LatencyMon is a special software designed to detect issues with your sound card and output.
- Download it from the official website:

- Launch the downloaded file and install LatencyMon.
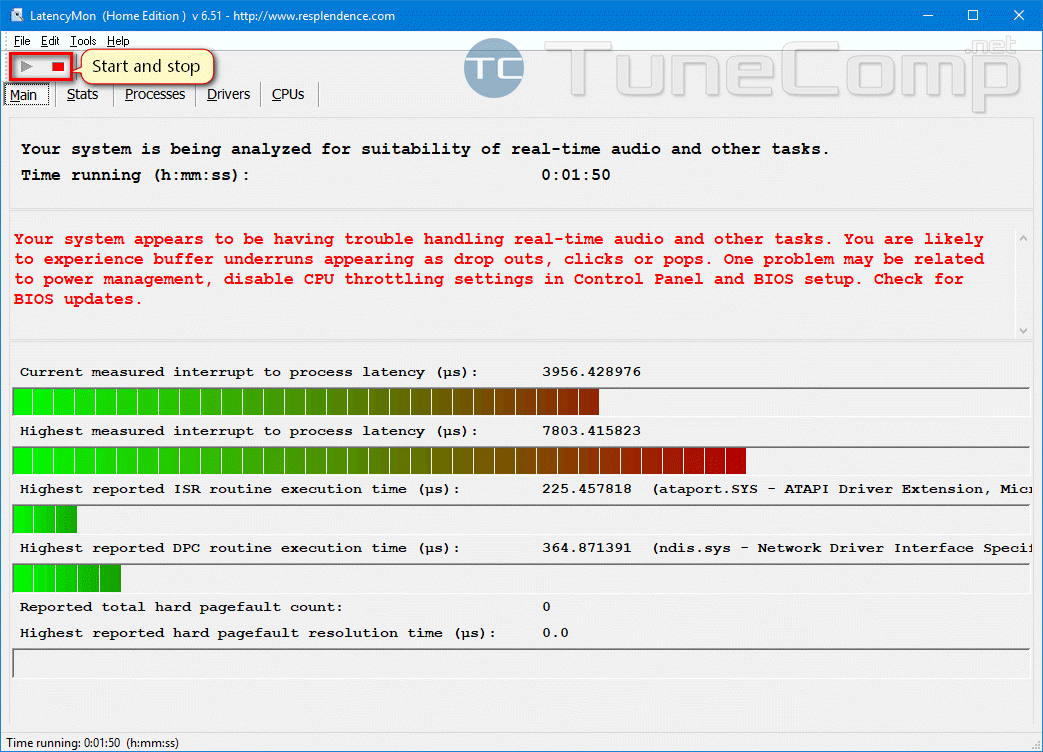
- Click “Start” to begin monitoring your sound quality.
- Do the ordinary work you usually perform on your PC and let LatencyMon run in the background for 5-10 minutes.
- Look at the report. Try to follow all recommendations displayed in red:

Share your experience on the problem in the comments section.