In this step-by-step guide I will explain how to rotate 4K 60 FPS video recorded by Samsung Galaxy S10, S9 or Note 9 in Adobe Premiere and save it without quality loss.
Why Rotate Videos Recorded by Galaxy S10, S9, Note9?
As you might know, Galaxy S9 can record 4K 60 FPS video at about 70 Mbps bit rate. It’s quality is outstanding. But from time to time the nasty surprise happens. When you start watching your video clip it turns out that the video clips are sideways. They are still in great quality 4K 60 FPS, but it’s impossible to watch them comfortably.
I also faced this problem several times. I remember exactly that I was holding my Galaxy S9 in horizontal orientation while recording and I had screen rotate enabled but nonetheless the video clip turned out to be sideways. I can even presume that this is a rare glitch of S9, because I have never faced such an issue on other phones.
Maybe, we all should rotate the phone to horizontal position and wait for a couple of seconds before tapping the Record button. If you know more, please drop a few lines in the comments!
But our goal is to rotate the video clip in Adobe Premiere and export it without the quality loss.
Who Needs This Tutorial?
The Quality is not Only the Resolution and Frame rate. The bit rate Also Matters! Everybody is able to select 4K 60 FPS. But after you export your edited video and compare it with the original one you may get frustrated. There are a lot of audio and video settings in Adobe Premiere export options that you should know about.
Step 1 – How to Rotate 4K 60FPS Video in Adobe Premiere
Launch Adobe Premiere.
Create a new project File > New > Project > Give it a name and click OK.
Wait a few seconds for the project to create.
Drag and drop the video clip you want to rotate to the Timeline section.
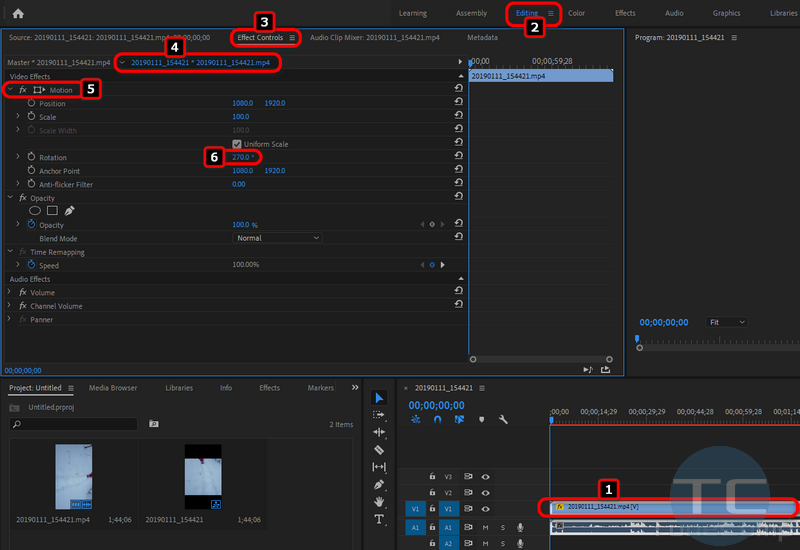
Сlick on the video in the Timeline to select it.
Select Editing > Effect controls on the upper left.
Find the Motion group and open it.
Type 270 or 90 degrees in the Rotation field depending on how you wish to rotate your video:
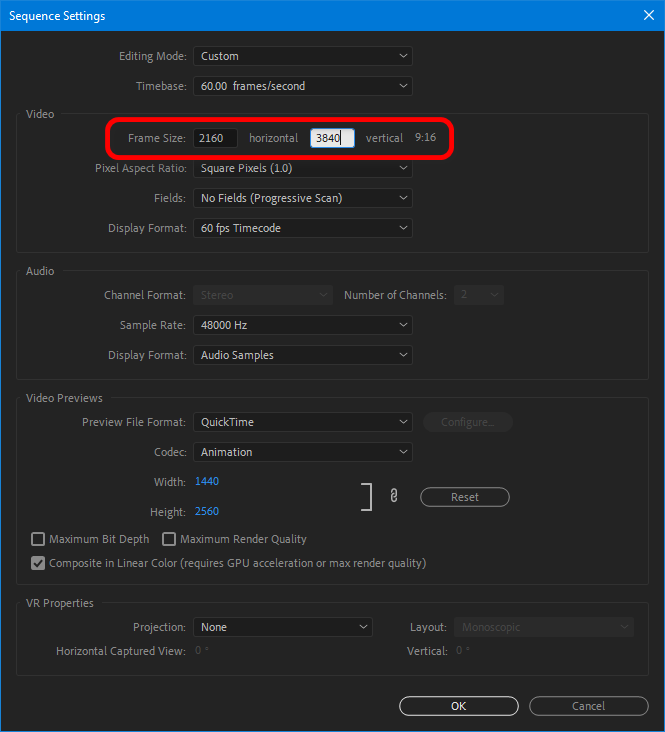
Now right-click the video thumbnail in the Project section and select Sequence Settings:
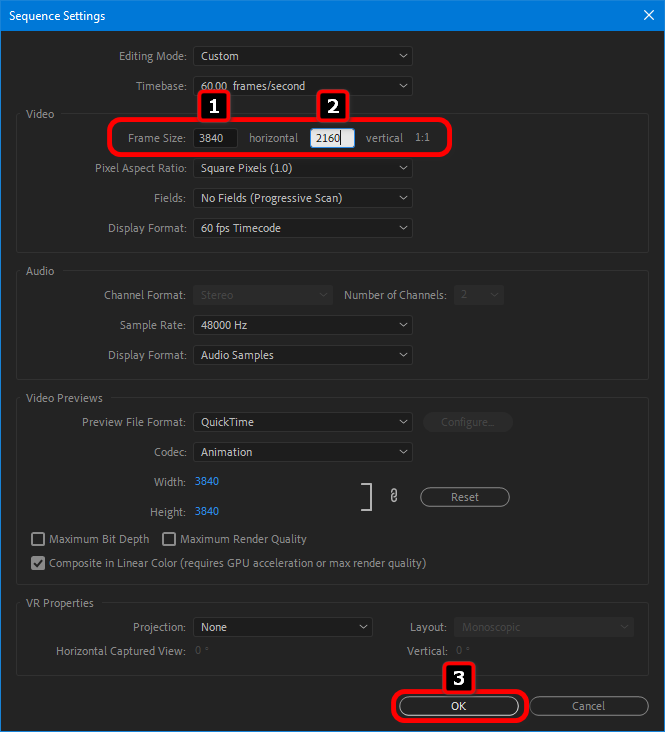
Manually change the frame size. If you initially have 2160×3840 you should specify 3840×2160, if you have 1080×1920 you need to change it to 1920×1080, etc. The initial frame size Just interchange the height and the width values and click OK:
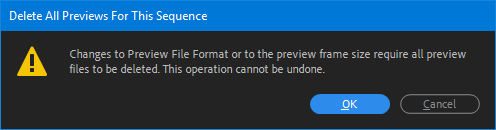
And finally confirm the changing of the frame size:
Done! Watch the video guide if it is more easy to perceive.
Video Guide
Step 2 – How to Export Video Recorded by Galaxy S10, S9 without the Quality Loss in Adobe Premiere
As I said before, we need to preserve not only the resolution but the video quality as well. That’s why you should know a lot of things related to the quality, compression and export settings.
Click File > Export > Media or click on the timeline to put it into focus and then press CTRL+M on your keyboard
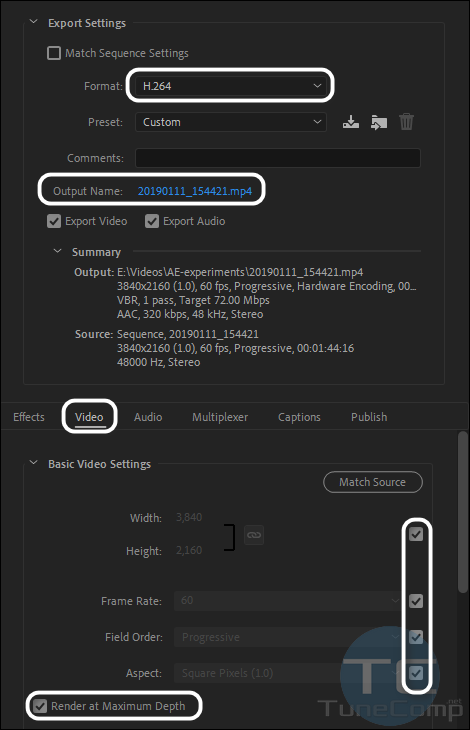
In Format select H.264
Specify the output name and folder
Now move down and select the Video tab.
In front of Width, Height, Frame Rate, Field Order, Aspect set the check boxes for Adobe Premiere to keep the initial video specs.
Set the checkbox Render at Maximum Depth:
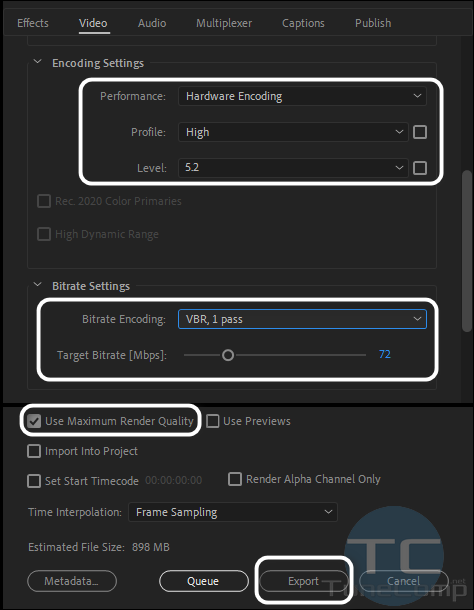
Profile = High.
Level = 5.1 or higher.
Bitrate Encoding = VBR, 1 pass.
Target Bitrate = 72.
Set the checkbox Use Maximum Render Quality:
Click Export to start exporting the video you rotated to the file.
One More Thing for Experts
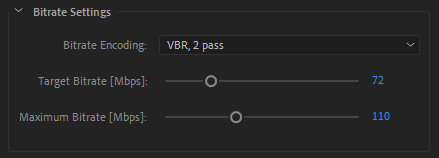
I noticed that after exporting the video had about 35 Mbps instead of 72 Mbps. The quality is fine but it does not match the selected target bitrate for some reason. I’ve done a few experiments and found out that I can force Premiere to export the video in 72 Mbps if I select VBR, 2 pass, 72 mbps as Target Bitrate and 110 Mbps as Maximum bitrate. However, this will take more time to render.
Conclusion
Tell us, what you think about the guide. Any additions and corrections are appreciated.