Contents
Automatic maintenance is a number of measures designed to maintain your system in good working condition: diagnose problems, install updates, defragment hard drives, run anti-malware scans, etc, at specified time if you are not using your PC. Otherwise the operations should be rescheduled to another time. In most cases this feature is really helpful because it keeps your Windows and apps up-to-date and protects against malware. But in some situations you might want to turn it off because it does something wrong. Here is how to disable automatic maintenance in Windows 10 and Windows 7.
What’s the Point?
As we wrote above in some rare cases automatic maintenance is able to do wrong things. For example, desktop icons may disappear from time to time for no reason or maintenance tasks launch when you are using your PC and it slows down the performance, etc.
How to Disable Automatic Maintenance in Windows 10
Option 1: Use the registry editor
- Press “Win+R”.
- Type “regedit”.
- Hit “Enter”.
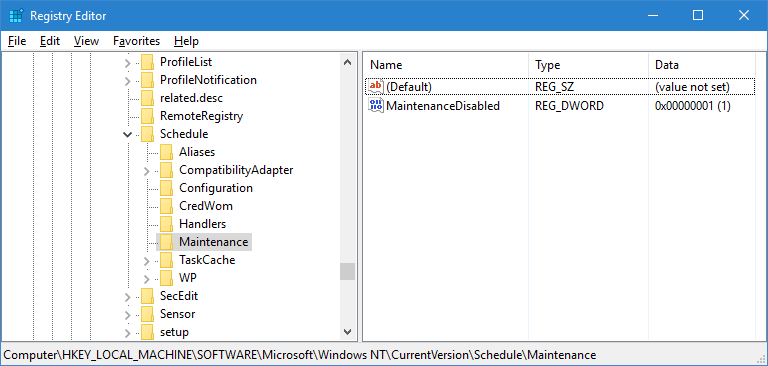
- Head to
[HKEY_LOCAL_MACHINE\SOFTWARE\Microsoft\Windows NT\CurrentVersion\Schedule\Maintenance]
(create “Maintenance” key in “Schedule” if it is absent).
- Create a new “DWORD-32 value”.
- Name it “MaintenanceDisabled”.
- Set it to “1”:

Option 2: Use reg-files
It does exactly the same as described in Option 1 but you don’t have to do things manually.
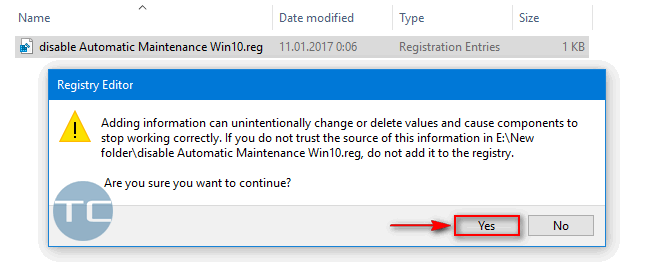
- Download our ready-to-use reg-keys allowing you disable automatic maintenance tasks and enable it again at any time.
- Double-click on disable Automatic Maintenance Win10.reg and agree to add information to the registry:

Disable Computer Maintenance in Windows 7
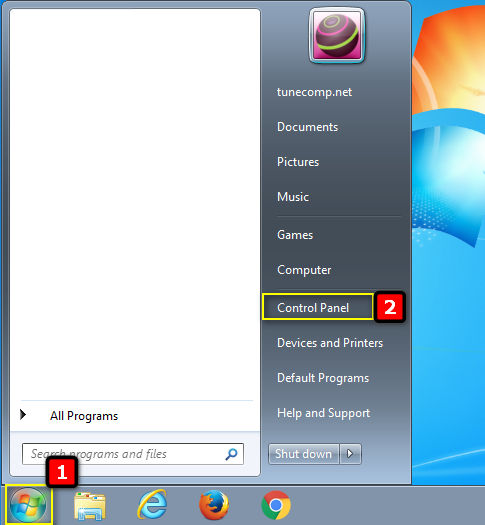
- Head to “Control Panel”:

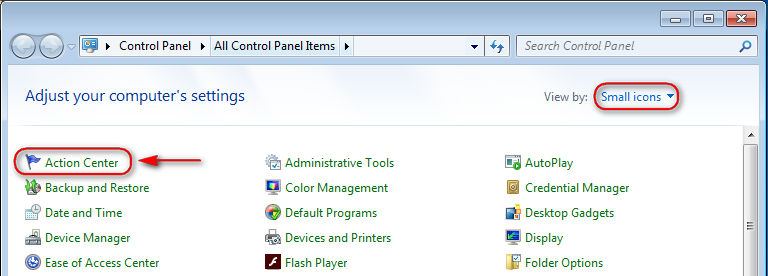
- Select “View by: Small icons”.
- Open the “Action Center”:

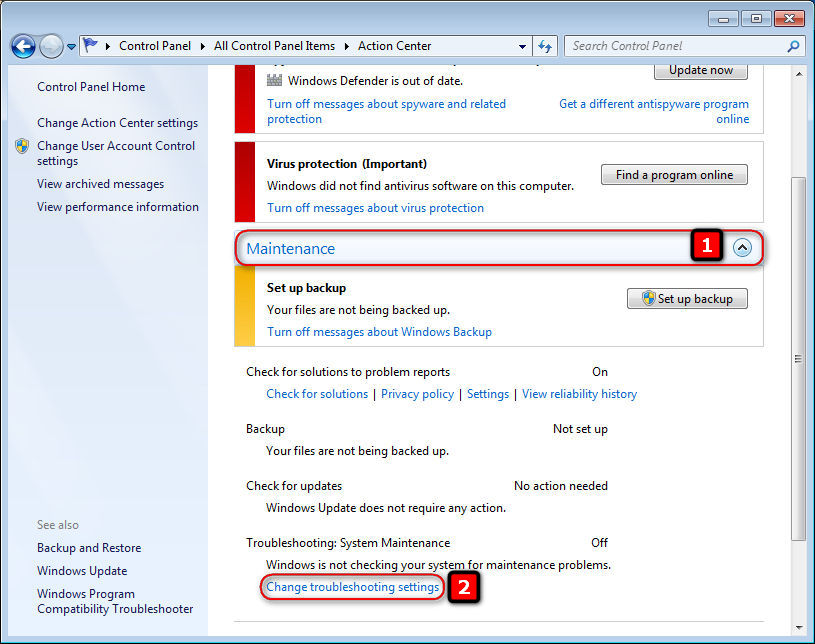
- Click on “Maintenance” to expand it.
- Then click on the “Change troubleshooting settings” link:

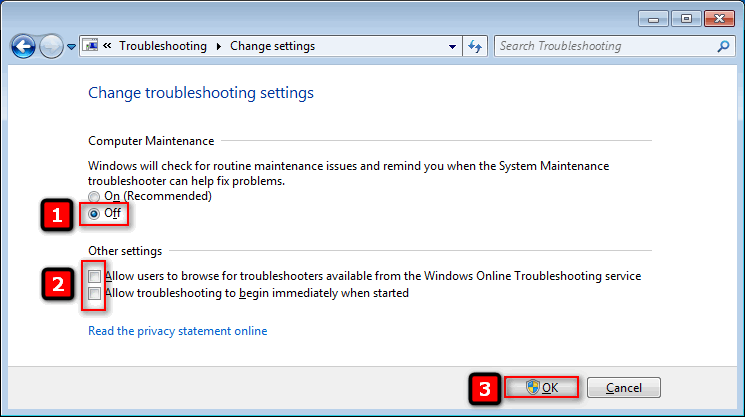
- Here switch OFF the Computer Maintenance, uncheck two flags in “Other settings” and click “OK”:
 That’s it. Feel free to ask questions in the comments section!