Contents
I’m sure, most of you’ve noticed the word “Public” under the network name in Windows 10 many times. But I bet that few of you really know what this description means in fact. Some time ago a friend of mine asked me with a frown “How can my home Wi-Fi be public?” what made me laugh a lot. Well, from this article you will learn about the following basics:
- what is the difference between public and private networks;
- how to change public network to private in Windows 10, regardless of whether it is wireless or wired.
What is the difference between public and private networks in Windows 10
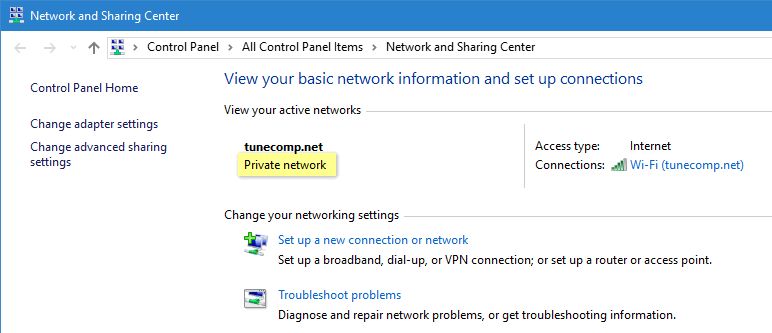
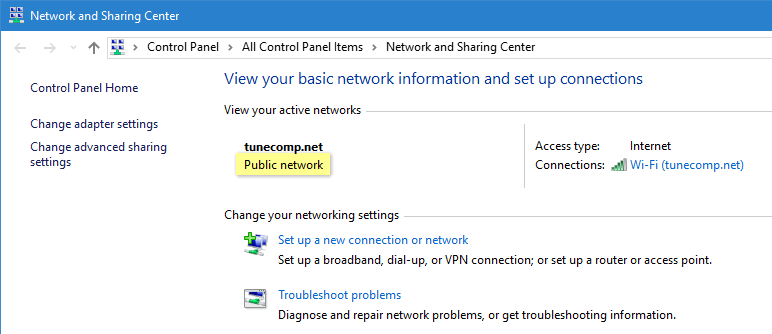
Public network is a profile for unfamiliar and potentially dangerous networks. It is designed to be used in hotels, restaurants, etc. When the connection is marked as public your PC is protected and cannot be discovered by other devices on the LAN. Thus, it is much harder for hackers to gain access to your PC and steal your information.
Private network is another profile type designed for use at your home or office that are well-protected and where you trust all devices. In private networks your PC can be discovered by other devices: desktops, laptops, phones, tablets, TVs, etc.
How to change public network to private
The easiest way for Windows 10
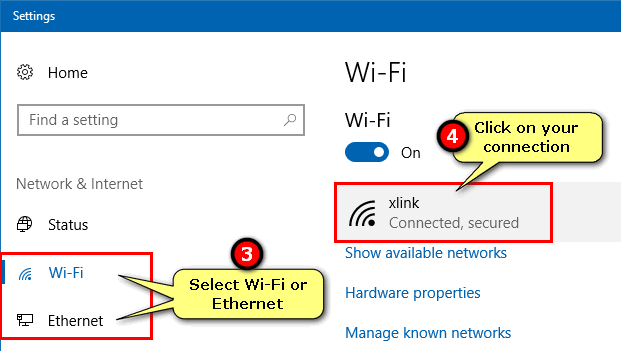
Since Fall Creators Update released in October 2017 there emerged a simple setting that allows you to quickly switch the connection profile. All you need to do is:
- Right-click the ethernet or Wi-Fi icon in the Taskbar.
- Select “Open Network & Internet settings”:

- Select “Wi-Fi” or “Ethernet” depending on which one you are using right now.
- Click on the network connection the profile of which you are going to change:

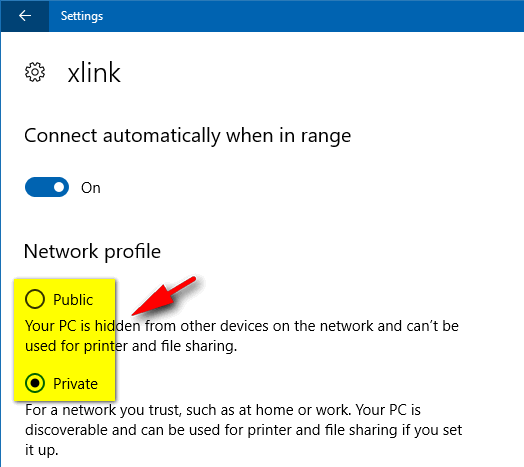
- Here you can switch “Network Profile” to “Private” or “Public”:


If you can’t find such selector you are likely to have an older version of Windows 10. In this case follow the steps from paragraphs below.
Change a wireless network from public to private
Let’s say you are connected to a public hotspot but you trust it enough to make it private:
Follow the steps:
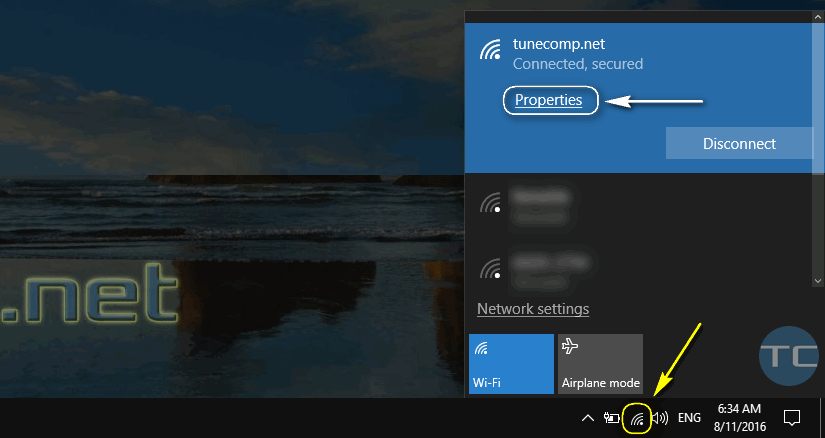
- Click on the wireless icon in the Taskbar.
- Make sure you are connected to the network.
- Click on its name.
- Select Properties:

- Turn on Make this PC discoverable:

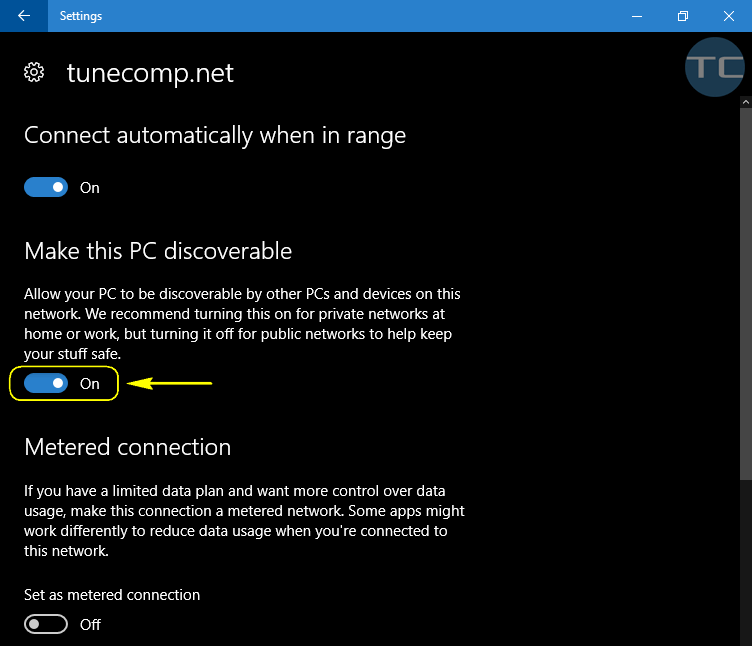
When you switch the selector On you change public network to private:

How to make a Wi-Fi hotspot private in Windows 10 when connecting to a new Wi-Fi
When you connect to a new Wi-Fi hotspot, you are asked “Do you want to allow your PC to be discoverable by other PCs and devices on this network?” Click Yes and your wireless connection will be treated as a Private one:

How to change public wired network to private in Windows 10
Follow these steps to change your Public ethernet connection to private:
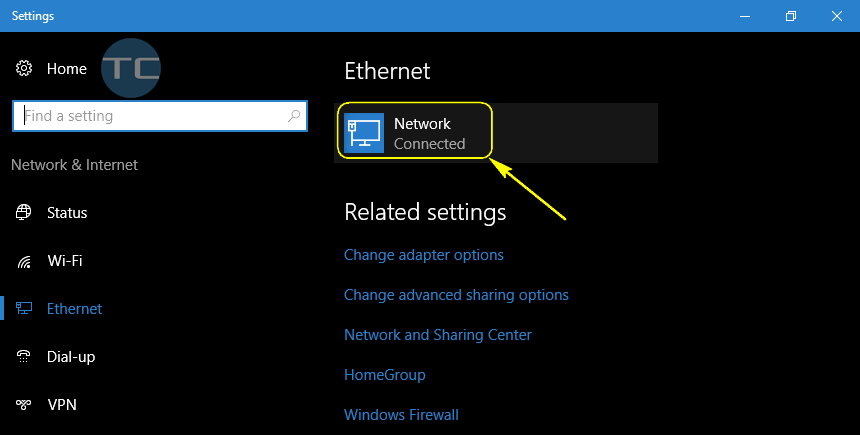
- Click on the ethernet icon in the Taskbar.
- Now click on your wired network name (it can be called whatever you like: “dlink”, “941nd”, or exactly like your wireless network, etc):

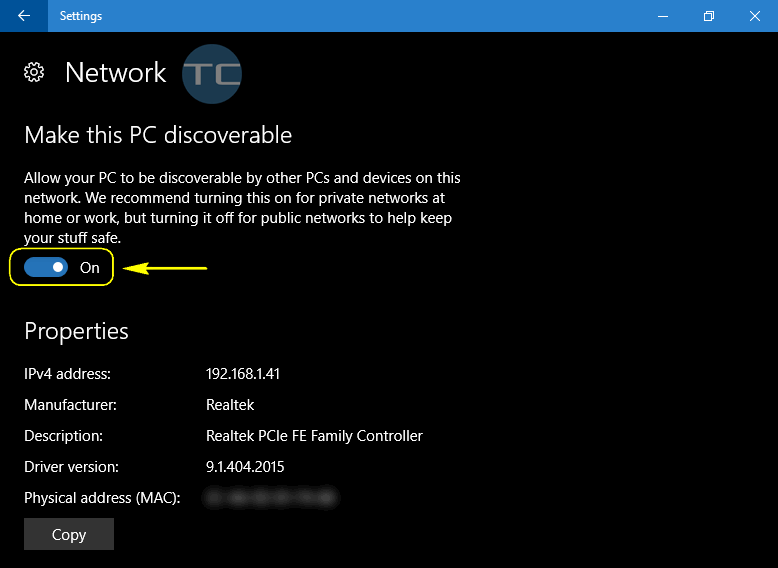
- Click on your wired network name once again – now in the Settings – Ethernet window :

- Turn on the network discovery for your PC:

That’s it!
We hope, this guide helped you and gave answers to all your questions. If something stays unclear, please feel free to drop the comment below! Have a nice day!