How to Set a Static IP-Address for Wi-Fi on Android 10, 9, 8
Contents
If you encounter problems while using DHCP (auto IP obtaining) on Android you might need to manually set a static IP-address.
You may also decide to assign a static address to your Android phone if you want to use a specific IP on a Wi-Fi network but don’t want to set up the IP reservation on your access point or if you simply don’t have access to the router settings.
You can easily revert the network setting to its default state at any time and continue using DHCP.
Here is how to set a static IP-address on a phone or tablet running Android 10 and older versions.
We illustrated the article using screenshots from Samsung Galaxy One UI 2.0 (Galaxy S20, S10), One UI 1.1 (S9), Samsung Experience (S7), old Touchwiz (Ace 3) and stock Android 8 to 10 version (Google Pixel).
Set a Static IP-Address on Stock Android
Android 8
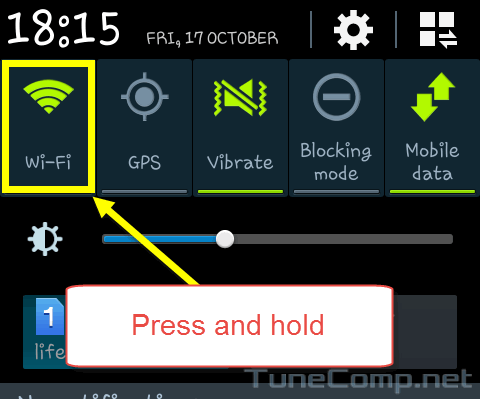
Pull down the shade.
Touch and hold on the Wi-Fi toggle to open its settings:
Connect to the wireless network you want to set a static IP-address for.
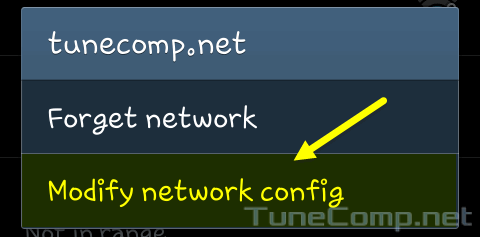
Long tap on your Wi-Fi network name.
Select Modify network:
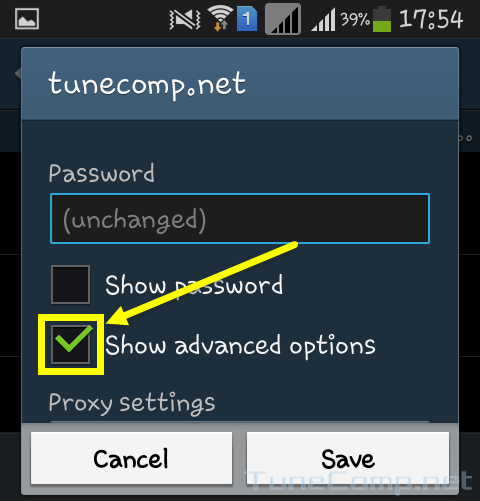
Tap the arrow to show the Advanced options.
In IP settings select Static.
Specify IP-address for this Android device. You should use a free IP from the range. For example, 192.168.0.150.
How to Switch Back to Automatic IP Address Obtaining
If you wish to obtain an IP-address automatically again perform the following actions:
Go to network config again:
Make sure the checkbox Show advanced options is set.
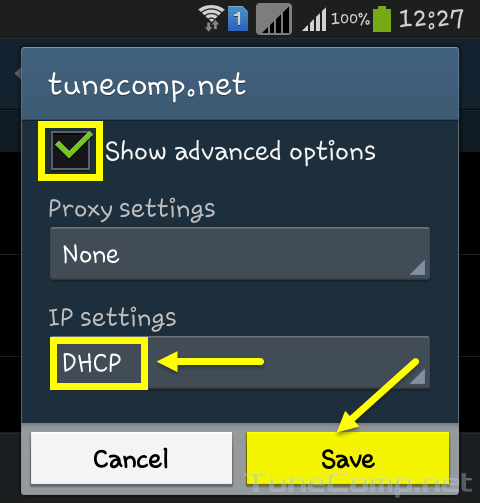
Select DHCP in IP settings drop down menu.
Press Save:
After that your device will reconnect to the network and obtain the IP from DHCP server.
Adam Swift
Adam is a real tech maniac. He likes to spend time testing phones, tablets, laptops, as well as any other technical devices, and write practical manuals on their functions. He often sleeps all day, but always works at night. Adam bought his first computer in 1999, being an absolute beginner who never held a computer mouse in his hands. He began to study Windows, constantly experimented and often crashed the operating system. But six months later, he was able to reinstall Windows 98 from a scratch on his own, fix almost any software problem on a PC, he also did hardware upgrades and realized that computers, operating systems and programs are now his biggest passion. In addition, Adam has always been a big lover of phones. With the advent of smartphones with Android OS, he began to pick at them much more than in computers. Now Adam loves to study privacy issues in instant messengers, blocking unwanted calls and other nuances related to privacy and security on the network. You can follow him on Twitter: https://twitter.com/tunecomp