Contents
The problem we are going to talk about in this article is the following: an Android phone or tablet gets stuck on “Obtaining IP Address” while connecting to a Wi-Fi network or says “Failed to Obtain IP Address” in the end.
Stuck Obtaining IP address is a very common Wi-Fi issue on Android devices. You can encounter it on all versions of Android OS.
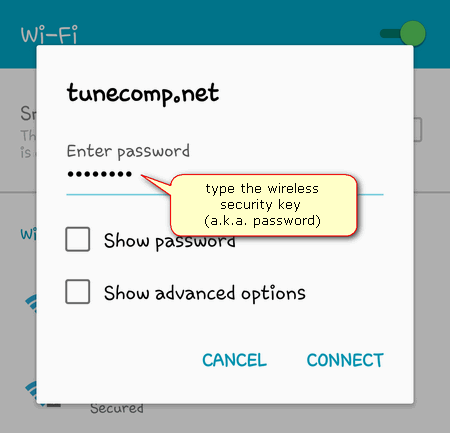
The error appears when you try to connect either to already saved Wi-Fi network or after you typed a password for a new wireless network.
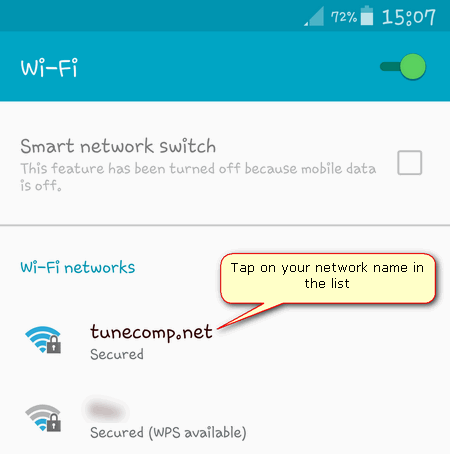
The problem looks like the following: you turn on Wi-Fi, try to connect to your router but your Android device does not connect to Wi-Fi network.
When you enter the wireless settings you can see: “Connecting…”, “Obtaining IP address” or “Obtaining IP address from” that goes on in an infinite loop.
Sometimes it says “Failed to obtain IP address”. The result of all those error is the same: you cannot connect to the Internet and consequently you are unable to use most of your apps.
It should be said, that you may encounter the stuck “Obtaining IP address” Wi-Fi issue on any version of Android from ancient 2.3.6 to Android 11.
The problem can occur on Samsung Galaxy, HTC, OnePlus and other devices. Very often CyanogenMod users are suffering the same glitch.
So you can try the guide on any Android smartphone or tablet. The steps are basically the same for all brands and models. So let us find out how to fix stuck “Obtaining IP address” and “Failed to Obtain IP Address” while connecting to Wi-Fi on Android.
There are various possible reasons for endless “Obtaining IP address” loop and “Failed to Obtain IP address” error on Android.
Here are some of them:
Below you will find ALL possible solutions to fix this Wi-Fi-related issue: from simple to more complicated. Some of them may seem ridiculous to you but it would be better that you try all of them.
First of all you should try these easy actions:
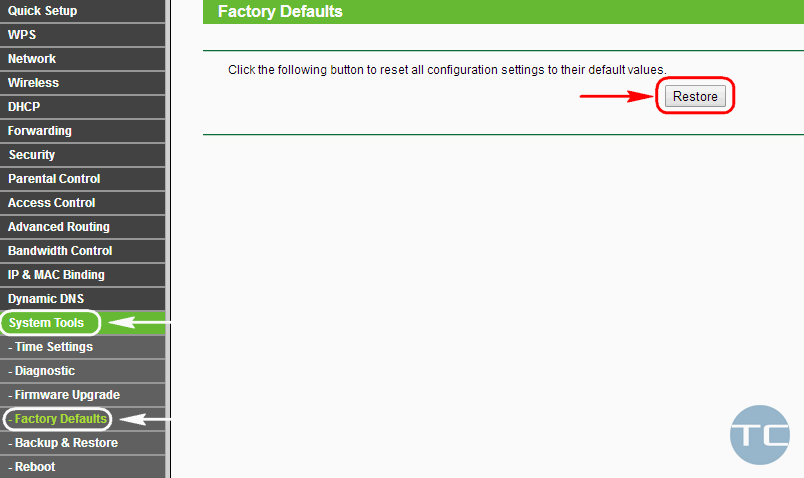
Reboot all devices to exclude the casual glitch. For example, to reboot TP-Link router you need to sign in to the router’s web interrface, then go to System Tools – Reboot and click on Reboot button:
To reboot your Samsung Galaxy device you should press and hold the Power button and then tap on Restart:
Warning! We advise you to perform a full reboot on your Android phone or tablet instead of turning Airplane mode on and off. You need to restart the operating system but not only wireless modules.
Possible reason: Rare glitch on HTC devices. Go to Wi-Fi Direct settings and rename your device. Here you should change the hostname which looks like ‘android_909892’ to any simple word in English, for example ‘HTC One’ or ‘John’.
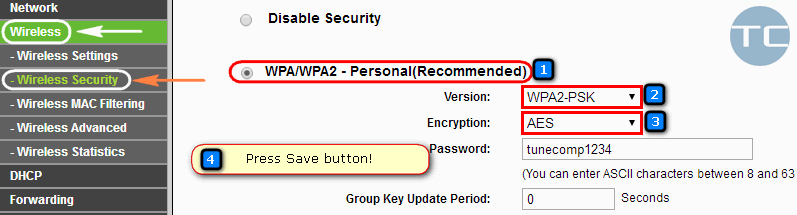
It is not recommended to use TKIP encryption as well as WEP security mode.
Private DNS can surprisingly turn out to be the culprit of network failure. Several users on the forums reported that they faced “Failed to obtain IP address” error right until they tried to disable Private DNS while troubleshooting the problem. And it suddenly worked. Such an issue was spotted on Android 10 Q and Android 9 Pie.
The reason why Private DNS provokes network conflict, which results in the error, is unclear by this time.
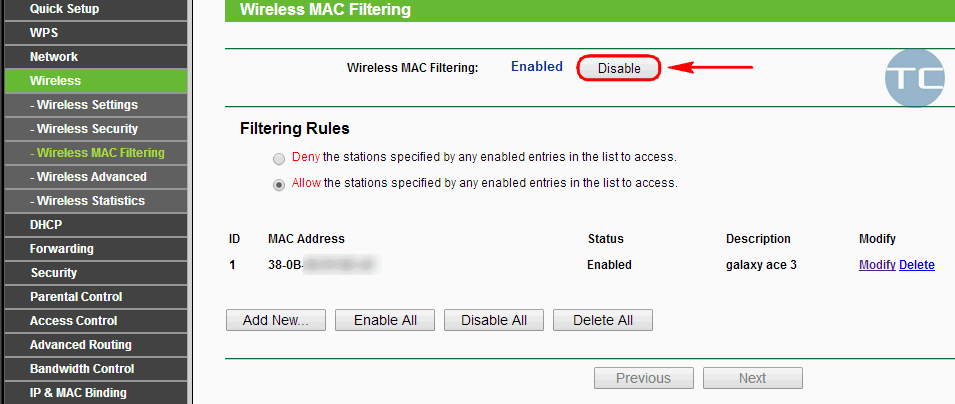
The router may be rejecting your Android device by MAC address. If the MAC filter feature is enabled and your device’s MAC address is not in the white list (or is present in the black list) you will face endlessly stuck “obtaining IP address” on your Android.
To fix that, go to your router settings, find MAC filtering setting and ensure that the MAC address of your Android device is not in the black list (if Black list mode is activated) or is present in the White list (if White list mode is activated).
It would be better to temporarily turn off the MAC filter just to understand if it causes the issue of Obtaining IP Address loop when you connect to wi-fi:
You will always be able to turn it back on and add your device to the white list (or remove from the blacklist).
Possible reason: the signal is weak.
Do not skip reading this paragraph! It is very important to understand that when the distance between your router and Android is too long you may encounter looping Obtaining IP address.
It happens because the router transmitter is more powerful than the one in an Android device. So the router’s signal reaches your smartphone or tablet but the response does not reach the router.
Thus it appears that your Android device sees the wi-fi network but cannot connect to it and successfully obtain an IP address.
Try to reduce distance between the router or AP and your Android device. If the router is yours try to place it geographically in the middle of your house or apartments.
Also take into account that walls and floors can weaken the Wi-Fi signal more than you can think. I
n some cases one wall can kill the signal so the client device cannot connect to the router even if the router is right behind that wall.
Possible reason: wireless interference. In very rare cases you will have “Failed to obtain IP address” if some neighbor network causes interference to your router’s Wi-Fi. Use WiFi Analyzer app to select the best wireless channel for your router:
Many users report the WiFi Fix app solved the issue of infinite Obtaining IP address. You can also try such apps from the Google Play Store.
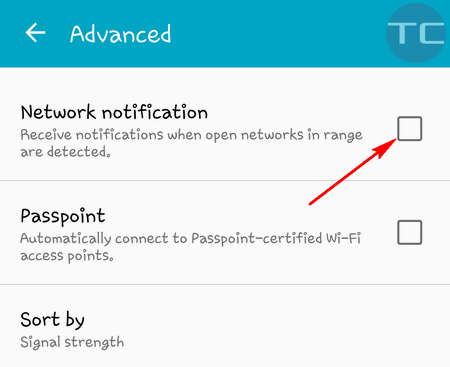
Go to Settings → Connections → Wi-Fi → Advanced and switch off Network notification:
This is not a full solution, just a wonky workaround. But if you cannot fix the Obtaining IP Address loop or Failed to obtain IP Address error on your Android, you may apply it as a temporary solution.
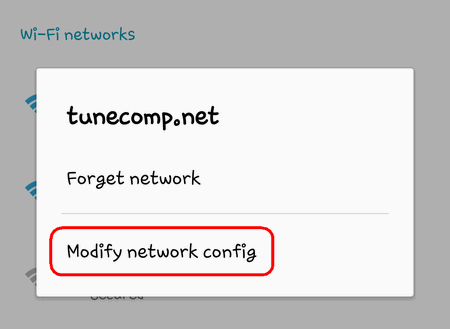
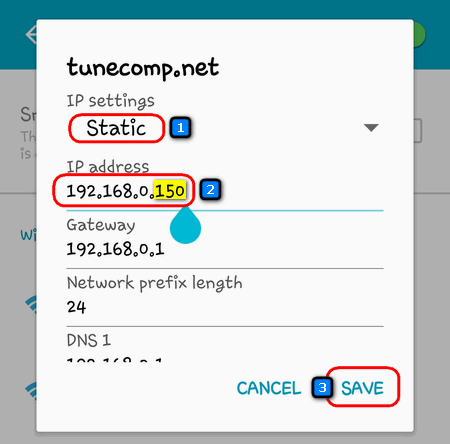
Follow this guide to manually assign a static IP to your smartphone or tablet.
Note that you need to know the router’s IP address for using this solution. Here we wrote about how to find it from an Android device.
If you are unable to access the Internet after you assigned the static IP, go back to Static settings and fill in the Gateway address and DNS1. In most cases both of them should containing the IP address of your router.
All modern phones and tablets that run one of the latest versions of Android support resetting network settings without deleting apps and data.
So, you should try this option to try getting rid of Failed to obtain IP Address error before you opt to factory reset your device.
I faced cases when glitches in Google Play Services seemed to be the reason why “Failed to Obtain IP address” error occurred on certain Android phones.
In some cases “Failed to obtain ip address” error emerges as a result of malware activity. A trojan or a virus can damage the system and cause unforeseen consequences.
1. Scan your Android device with Malwarebytes Anti-Malware app:
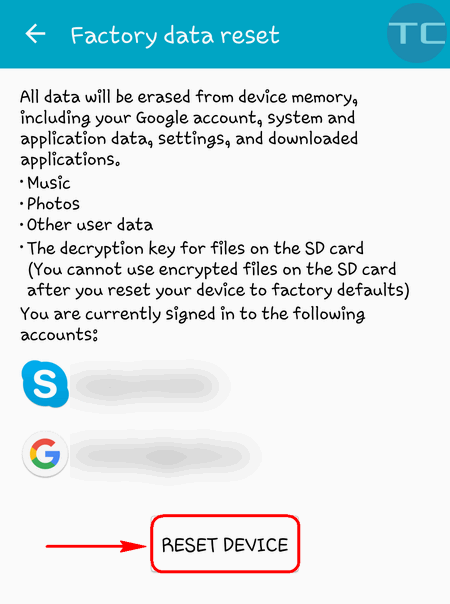
2. Try to reset your Android if nothing helps you fix the issue with Wi-Fi. Do not forget to back up all your photos, videos and music. Then go to Settings → Accounts → Backup and reset → Factory data reset and tap on RESET DEVICE:
First, make sure you know all credentials to get authorized at your ISP – write down or save in a text document your type of connection (PPPoE, L2TP, Dynamic IP) as well as your login, password and even the currently used MAC Address of your WAN port (in case if your ISP rejects connections from unregistered MAC addresses).
Then, restore your router to its factory defaults using its web interface or the physical Reset button on the unit.
When done factory resetting, configure your wireless router from a scratch.
As you understand, there are various reasons of the error and there are different methods to fix it respectively. We hope that our guide helped you get rid of the problem and you will never again see “Failed to obtain IP address” on your Android device.
That’s all solutions we know. You may suggest yours in the comments. Thank you and have a nice day!
The article was originally published on July 4, 2016 but is regularly updated.
This website uses cookies.
Read More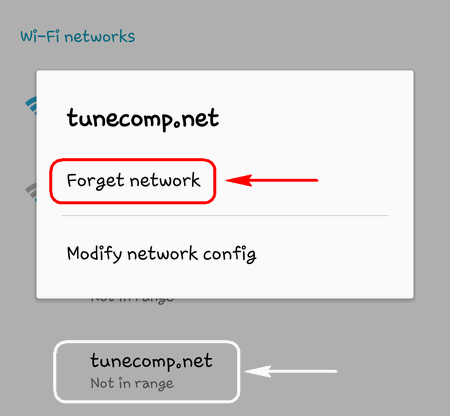
View Comments
u guys are awsm,thanks a lot
Thank You so much for the info. I have tried and it really worked very well. Once again thank you very much for the detailed info.
Which one of the solutions has worked for you?
I have directly tried "Solution 10", assigning a static IP address and IT WORKED. I didn't have to make any changes in the phone. All I had to do is to 'assign a specific IP address to the MAC address' in the router configuration.
In order to prevent the same problem occurring on other devices, I have assigned static IP addresses to all other devices.
Thanks so much for sharing this info. Solution TWO helped me way in the 'sticks' in Africa! No technicians to help for miles around! After days of research via a hotspot for info to get my newly acquired TP-Link to work! A million thanks! P.S. Please do not forward me any spam, data costs an arm and a leg!
Thank you so much. Solution 10. fixed it for me.
After 2 days, 8 hours, tons of stress and almost throwing my mobile phone on the wall, you Sir just fixed my problem.
Solution 10 fixed my problem.
Thanks a lot.
Thanks - a simple reboot of the router (the first part of Solution 2) did the trick for me.
Thank you so much. My wifi problem solve . again thnk u
You are the best, guys!!! 100% working
THANK YOU!!!!!!! IT WAS THE STATIC SETTING!!!