Contents
In general the Defender works good and it is worth using as a basic protection. It is able to protect your machine from wide variety of threats for free. But some people in definite situations wish to disable it and they should be able to do this. Here is how to disable Windows Defender in Windows 10.
Possible reasons why you may want to disable the Defender:
Note! You don’t need to disable the Defender manually if you are going to install a third-party antivirus. In this case the built-in protection will be disabled automatically.
Often people advise to turn off the Defender using the Settings app. Just go to the Settings and turn off Realtime and Cloud protection…
But note, that in case if you disable it, you will encounter two moments:
We advise to turn off Windows Defender using Group Policy. This will completely disable the app and you won’t be bothered by its notifications any more.
Create a new text file:
Open it in notepad.
Copy and paste this code to the file:
Windows Registry Editor Version 5.00

[HKEY_LOCAL_MACHINE\SOFTWARE\Policies\Microsoft\Windows Defender]
"DisableAntiSpyware"=dword:00000001

[HKEY_LOCAL_MACHINE\SOFTWARE\Policies\Microsoft\Windows Defender\Real-Time Protection]
"DisableBehaviorMonitoring"=dword:00000001
"DisableOnAccessProtection"=dword:00000001
"DisableScanOnRealtimeEnable"=dword:00000001
Save the file.
Set Windows to show extensions of known files:
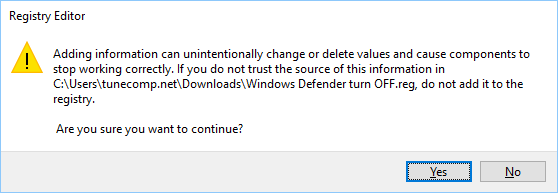
Click on your file and add the information to the system registry:
Reboot your PC to take effect.
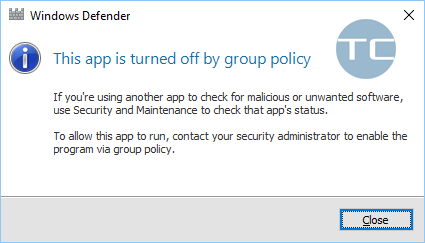
Now you won’t receive any notifications and if you try to launch Windows Defender you will see:
this app is turned off by Group Policy
Here is the archive containing two registry tweaks:
Please do not forget to reboot your PC after applying any of these tweaks.
This website uses cookies.
Read More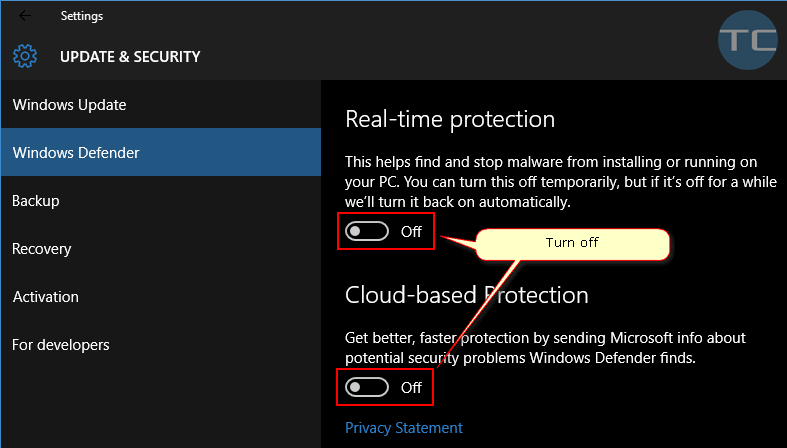