Contents
Night Light is a nice feature designed to lessen the eye strain by changing the color temperature while you are working in a dark room. It arrived with Creators Update in April 2017 and is available out-of-the-box. Here is how to turn on or disable Night Light and customize its settings in Windows 10.
How to Enable the Night Light Feature in Windows 10
- Click on the Action Center icon (or press CTRL+A):

- Turn on the Night Light feature by clicking on the corresponding toggle:
 Now your screen will change the color temperature and become warmer.

 Now your screen will change the color temperature and become warmer.
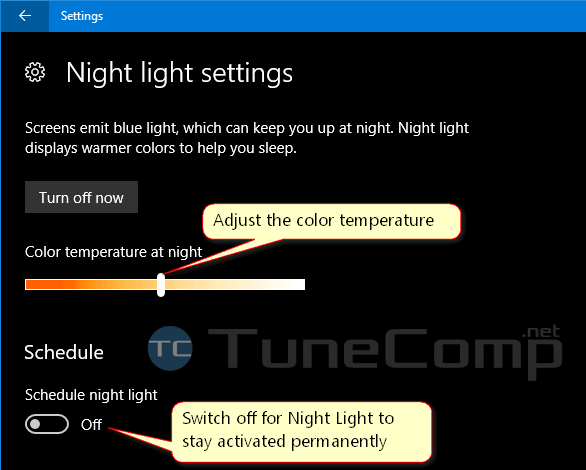
Adjust the Screen Tone and Make Night Light Stay Active Permanently
- Open the Action Center.
- Right-click on the Night Light toggle.
- Select “Go to Settings”:

- Adjust the color temperature by moving the slider. Specify the comfortable tone for your current environment.
- Turn off the Schedule if you wish the feature to stay active permanently:


That’s it.
thank you! works great! brilliant feature well explained!
The short cut key is WIN+A now. Switch off the schedule is still right. Thank you.