It is very important to have the system restore feature enabled in Windows 10. If it is disabled you will be unable to roll back your operating system to the previous state in the case of virus infection or a glitch. In this case the only way to get your PC to a working condition would be to perform a reset or even a re-installation from a scratch that takes much more time and does not save all your apps and settings. Here are the steps to enable the system restore in Windows 10. After you do this the restore points will be created automatically.
How to enable automatic creation of restore points in Windows 10
1. Press Win+Break to open the system window.
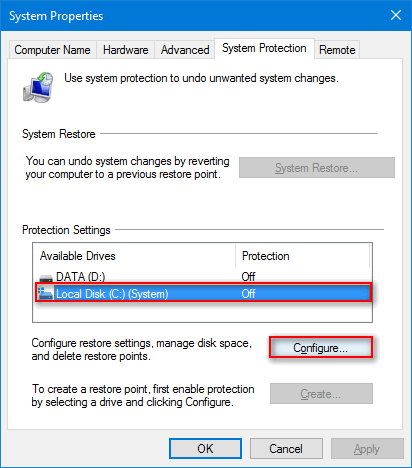
2. Click on System Protection on the left:

3. Select your system disk (in most cases Disk C).
4. Press Configure:
5. Select Turn on system protection.
6. Specify the amount of storage dedicated to system restore data. The more space you specify – the more restore points you would be able to store at the same time.
7. Press OK:

8. Press OK:
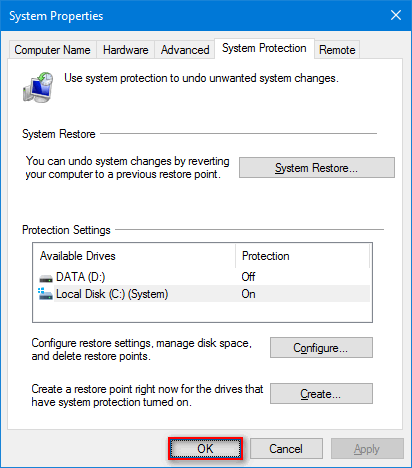
This is how it should be done!
Please, feel free to write your feedback in the comments section. Thank you and have a nice day!